Adho Mukha Vrksasana - the handstand
 Adho Mukha Vrksasana - the handstand
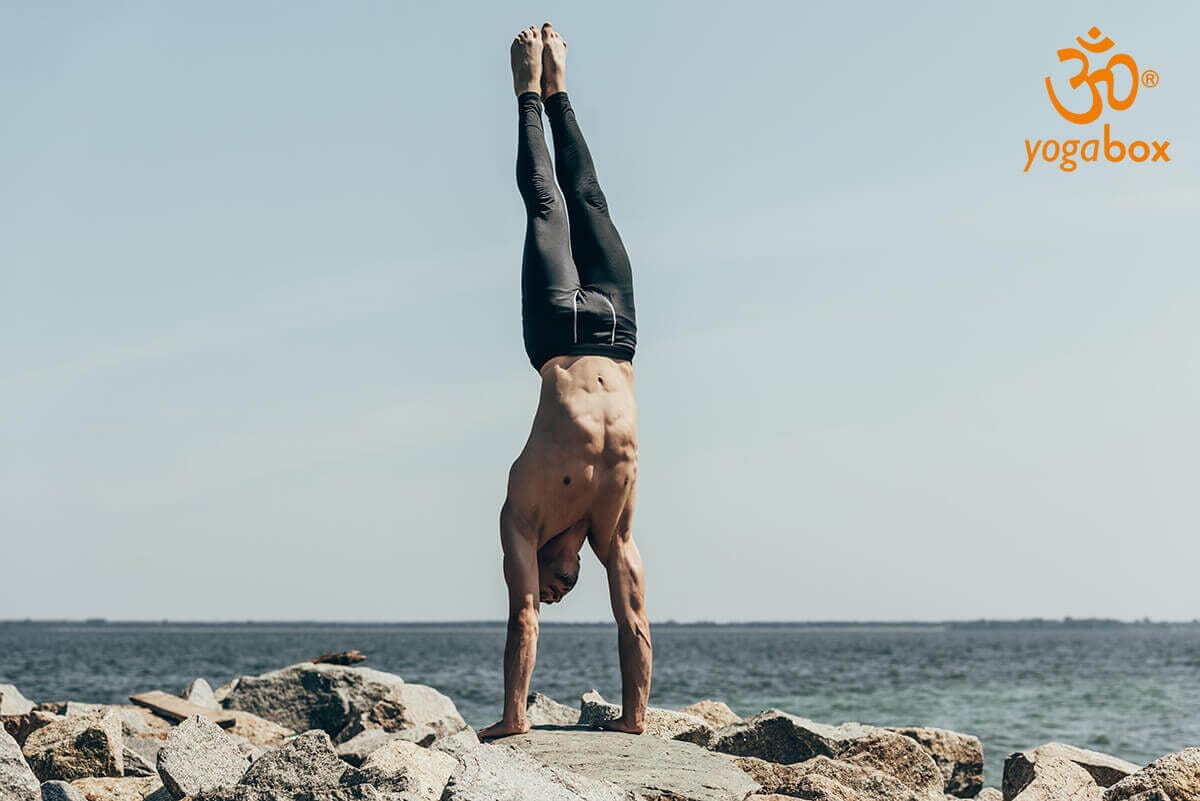
The Adho Mukha Vrksasana pose is one of the asanas that demands a very special level of concentration and physical balance. The handstand, when performed correctly, is no different from the classic handstand in gymnastics, yet the handstand in yoga is a more conscious exercise.
After all, this pose isn't just about shoulder strength and physical balance, but also about overcoming mental barriers . Closely connected to the handstand is the – only human – fear of falling. Learn how to gradually work your way up to Adho Mukha Vrksasana and why you absolutely should.
The slow and safe way to the handstand
First, make sure you're warmed up properly. Don't start a session with Adho Mukha Vrksasana; loosen your shoulders beforehand and use your workout routine to gently loosen up. To assume Adho Mukha Vrksasana, start in downward-facing dog (Adho Mukha Svanasana) and place your fingers just a few inches from the wall. Place your hands under your shoulders, fingers pointing forward, parallel to each other. Rotate your upper arms slightly outward to open your shoulder blades. Press your hands firmly into the floor.
Now pull one of your legs a step closer to you so that it is slightly bent. Do a few practice hops to get a feel for the necessary momentum. The goal is to keep your upper body straight, with your center of gravity (your hips) positioned vertically above your hands. This will make your legs almost weightless, allowing you to reach the Adho Mukha Vrksasana position with your long, stretched leg in a wide arc, then bring the bent leg up and stop. First, practice the handstand against a wall to ensure you remain secure. If you use too much momentum, the wall will stop you; if you use too little momentum, you'll land back on your feet. This feel for the necessary balance is important for eventually being able to perform Adho Mukha Vrksasana while standing freely. With each successful handstand, the next one will be a little easier.
The goal should be to achieve a straight handstand with your body completely stretched. Only your head is back, looking down at your hands. Try to hold Adho Mukha Vrksasana for 10-15 seconds and then gently land your feet again, slowly shifting your center of gravity. This will allow you to land softly, like a cat on your toes. If you perform Adho Mukha Vrksasana standing freely and find yourself wobbling, try to bend your legs towards your navel. This will help you land back on your feet. If you fall towards your back, quickly tuck your chin to your chest; this will cause your back to naturally round. Bend your arms to reduce the height of your fall and let yourself roll over. Remember these safety tips, and then you don't have to be afraid of falling. Especially at the beginning, occasional falls are part of the handstand routine.
Powerful pressure and energy flow
As with all downward-facing asanas, Adho Mukha Vrksasana benefits from the reversed blood flow, allowing the blood to slowly sink from your feet to your head. Unlike other vertically inverted poses, however, you must maintain the handstand with great strength and discipline, which naturally shortens the duration of the position. Physically, Adho Mukha Vrksasana is one of the most demanding asanas; the handstand challenges and develops your sense of balance, core strength, and, of course, your upper arms (especially your triceps), shoulders, and shoulder blades. You'll notice the effort as soon as you assume the pose.
In the handstand, you'll not only confront your fear of falling, but also be expected to find inner balance. The demanding nature of the exercise forces you to focus exclusively on your body and let go of everyday annoyances. At the same time, you'll develop your balance, body awareness, and self-awareness —which can also help you off the yoga mat.
Image © lightfieldstudios / 123rf.com


