Yoga BLOG

Wie kannst Du durch Yoga die Flexibilität verbessern?

How can you improve flexibility through yoga?

by Stefan on Nov 13 2023
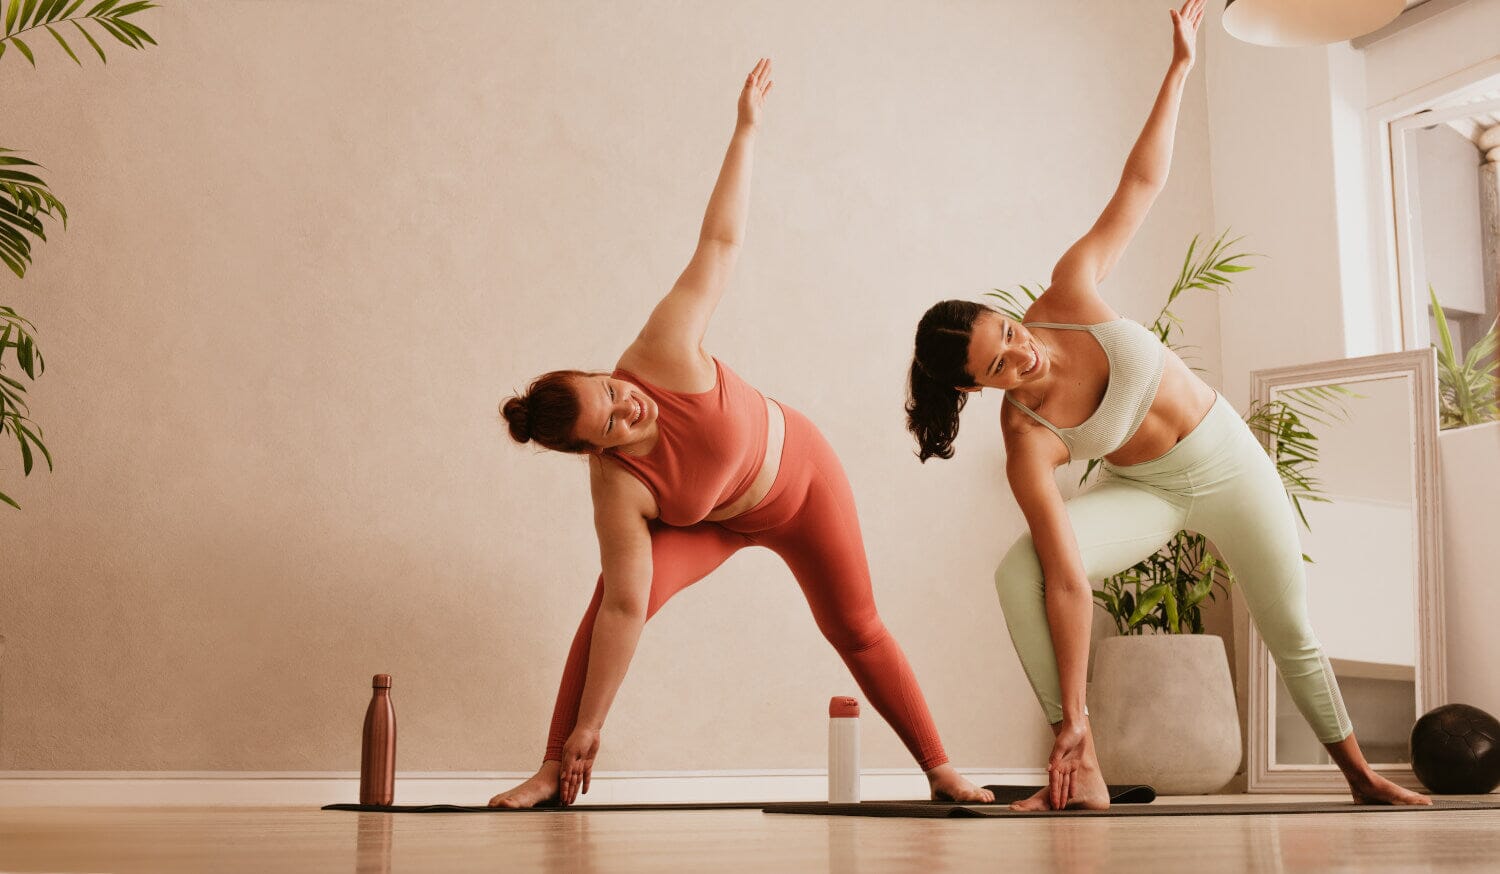
Yoga is healthy – on many levels. Perhaps you've experienced how yoga has helped you significantly in various situations in your life. The various yoga poses can have outstanding effects on flexibility, strength, and mobility. In this article, you'll learn the most helpful information on flexibility and which asanas you can implement in your everyday life. Flexibility and mobility: what's the difference? Flexibility is one of the five core motor skills and is therefore important for holistic health of body, mind, and soul. If your entire body is flexible, this also affects your way of thinking and the carousel of thoughts in your head. In everyday language, we often use the words "agility" and "flexibility" to mean the same thing. Strictly speaking, these are two different things. What is mobility? By mobility, we mean the movement of the joint (i.e., the manner in which it moves). The joint must be able to move without restricting the surrounding tissue. Therefore, the strength of the tissue plays a major role. If it is not strong enough, injuries can occur. If someone suffers an injury, they can no longer use the joint to its full extent. Furthermore, the body parts that play a role in the overall movement are affected. For example, if you need your upper arm to rotate your shoulders, an injury to your elbow can limit movement. What is flexibility? It can influence mobility. However, the reverse is not true: mobility does not affect flexibility. If a muscle is not flexible, mobility can suffer. In other words, you can remember this: Flexibility refers to the length of a muscle. Mobility, on the other hand, refers to the range of possible movement. Can yoga improve your flexibility? In general, it can be said that Buddhist asanas can make your body more flexible. Of course, this always depends on the practice you perform on your mat . Acro yoga, for example, is considered a type of yoga that can increase your flexibility. If you want to optimize your flexibility and body strength, you can try Budokon Yoga. Unlike other yoga styles, this combines typical asanas, bodyweight exercises (calisthenics), and martial arts (full-contact combat sports). In addition, more common yoga styles provide more flexibility and mobility, such as yoga exercises from Vinyasa Yoga, Ashtanga and Yin Yoga. What are the basics of flexibility training? Especially as a beginner, it is important to follow certain principles: You can identify your pain threshold and push yourself to it. If you feel the corners of your mouth no longer relaxed, then you've probably reached that threshold. It is important that you stretch slowly – while sitting on your meditation cushion , lying down or standing. The stretch should be done to the point where you reach the threshold of pain – only then can the effect take place. What are essential stretches? There are different ways you can stretch your shoulders, hips, arms, back, legs, and other parts of your body. a) Static stretching With this stretching exercise, it's important to place your muscle in a certain position, thereby stretching it. Then you stay in that position for about 20 seconds. b) Dynamic stretching This briefly activates the muscle and mobilizes the joints. This prepares the muscles for other, more challenging movements. c) Isometric stretching This type of stretch is characterized by the fact that the muscles involved in the movement work against the stretch. This tenses the muscles so that the tension is simultaneously reduced. d) Active-static This is also a static stretch. In this type of stretch, the antagonist muscle is used. However, the asana is followed by relaxation. e) Passive-static You'll need a partner or external support for this stretch, so it's a great option for partner yoga. Which yoga exercises help you become more mobile and flexible every day? If you want to work efficiently on your flexibility, you should practice the following asanas daily. 1. Dancer For beginners, performing this yoga pose may be challenging, as you'll need to have some balance training. This asana is perfect for developing your balance. At the same time, it stretches your leg muscles and back. You stand upright on one leg, stretching the other leg back and taking the foot in your hand. The other arm is extended forward while you maintain balance. 2. Seated forward bend This pose is very popular for relaxing and improving flexibility at the same time. You sit on your bottom and stretch your legs forward. Your upper body is directed downward, while your hands touch your feet. If you can't reach that far forward, it's okay at all—just grab whatever you can, your knees, your lower legs, etc. This posture ensures that your legs and back are sufficiently stretched. 3. Arch For this pose, lie on your stomach and bend your legs. With your feet in the air, your arms pointing behind you. Grab your feet with your hands, bending your upper body and legs like a bow. If you practice this asana regularly, you can stimulate your metabolism and stretch the front part of your body. 4. Shoulder stand To improve your hormone release, you can do the shoulder stand. You lie on your back and raise your legs in the air. You support yourself on your hips, with only your head, shoulders, and neck on the floor. This pose takes some getting used to at first. However, if you practice it regularly, you'll notice that it can make a difference in your well-being and the intensity of the stretch you can achieve. This exercise stretches your cervical spine and promotes flexibility in your spine and neck. Have you ever done any stretching and flexibility exercises? If so, what's your favorite?
Die acht Glieder des Raja Yoga

The eight limbs of Raja Yoga – what are they?

by Nick on Jan 22 2023
The eight limbs of Raja Yoga – Image © snedorez / 123rf.com Raja Yoga is a truly life-changing teaching. The name itself conveys the profound significance of this style of yoga. Raja means "king," thus it is the "royal" yoga. The eight stages/limbs of this yoga style are unique and can transform the yogi's life in a lasting way. If you would like to learn more about royal yoga and embark on this path, you can read this article. It will inspire you to greater inner freedom. Raja Yoga: Definition and a short explanation Yoga is a very ancient teaching and encompasses various techniques for achieving enlightenment and mastery of the mind. Unlike traditional yoga styles such as Hatha Yoga , Kundalini Yoga, or Yin Yoga, Raja Yoga relies on different fundamental principles. Raja Yoga is one of the four paths of yoga; the other three are Karma Yoga, Bhakti Yoga, and Jnana Yoga. Raja comes from the ancient Sanskrit teachings and means "king" or "ruler." All this knowledge goes back to the wise man Patanjali , who remains a well-known name in this field to this day. He wrote the Yoga Sutra, which can also be described as a guide to yoga. Many equate Ashtanga Yoga (eight-limbed yoga) with Raja Yoga. The goal of Raja Yoga is to let go of "control" over the mind, which is often difficult these days. Many people are so overwhelmed by their daily lives and all the challenges they face that this is reflected in a very restless mind. What can you do to calm yourself down? Depending on your personality and the challenge you face, there are various ways to become calmer. Raja Yoga uses various meditation techniques, breathing techniques (pranayama), and physical asanas. Of course, self-observation is also essential for becoming calmer and more aware, as well as for going through everyday life with greater focus. The Eight Limbs of Raja Yoga: On the Path to a Free Spirit Many people are restless and turn to yoga for this problem. Raja Yoga helps you become calmer and more peaceful within. The reason people are so scattered and restless is the kleshas. These are the passions that cloud and confuse the mind and thoughts. Fear of death (Abhinivesha) too much selfishness (Asmita) Knowledge that is not true (Avidya) Adhering to certain preferences (Raga) Excessive aversion (Dvesha) The goal of Raja Yoga is not to completely eliminate all these passions. Instead, it is important that you follow the path of Ashtanga Marga and reduce the influence of the kleshas on your behavior. Overview: the eight limbs of Raja Yoga The following section introduces the eight limbs of Raja Yoga. The order in which they are performed is not important. However, in order to develop spiritually, all steps must be practiced and studied. 1. Yamas (dealing with the world, environment) We don't live alone in this world, so it's essential that we live in harmony with the environment. Our interactions with other living beings are important. Yama is divided into five sub-themes, each of which is already very intensively addressed (e.g., Ahimsa : striving for the absence of injustice, treating all living beings with respect, Asteya : not stealing or taking what isn't yours, etc.). 2. Niyamas (how to deal with yourself) This section is about engaging with and reflecting on oneself. Here, too, there are five sub-points that demonstrate how one's mind and body should be treated, for example, shaucha (purity of the body), santosha (modesty with one's possessions), svadhyaya (exploration of one's self), etc. 3. Asanas (physical exercises) The asanas are almost the most well-known aspect of the eight-limbed path and the aspect that many people in the Western world also practice. There are countless different yoga exercises for the mat that harmonize body, mind, and soul. They also increase the practitioner's life energy and physical vitality. The effect of the exercise naturally always depends on the yoga style; Hatha Yoga has a different effect than Vinyasa, yet they all help people achieve inner peace. 4. Pranayama (breathing techniques) This point is also relatively well-known, as people all over the world practice breathing exercises in their daily lives. This requires a good degree of physical discipline. Prana is the energy that surrounds us all. There are various breathing exercises, most of which involve the same components: Exhale Hold your breath with empty lungs Inhale Holding your breath with full lungs 5. Pratyahara (dealing with the senses) This section is about controlling the senses. Pratyahara describes the withdrawal of the senses to protect yogis from sensory overload. Furthermore, no one is distracted from the essential tasks. This allows you to increase mindfulness. 6. Dhyana (meditation) In this stage, you'll learn about meditation. The goal of a meditator is to have fewer thoughts in their head while resting on the cushion , or to let them drift away. This is very difficult, especially for beginners, but with time and a little practice, you'll get better and better. With enough practice, you'll notice physical and mental differences; even in stressful situations, Raja Yoga helps you remain calmer and more focused. 7. Dharana (concentration) If you want to take this path, you should learn to concentrate completely on one thing. No one should be constantly distracted. In this context, try to focus on one specific thing during the exercise. Over time, this will become easier. 8. Samadhi (inner freedom) This point marks the culmination of the path and the goal of every yogi. The goal is to achieve the state of absolute being: a moment in which you can merge with reality, become one with God, and feel all knowledge within you. How can you integrate these stages into your life? These stages may seem very challenging at first and will naturally require a lot of time to integrate into your life. Initially, it's important that you know all these elements and gradually incorporate them into your daily routine. Everyone will have different preferences. Do everything at your own pace and don't let yourself get stressed. Don't compare yourself Read a book for more information to gain a better understanding. Find like-minded people with whom you can be motivated to follow the path Do you already practice these eight limbs in your daily life ? Have you already integrated them all?
Pranayama - die Atemübungen des Yoga

Pranayama - the breathing exercises of yoga

by Nick on Aug 13 2021
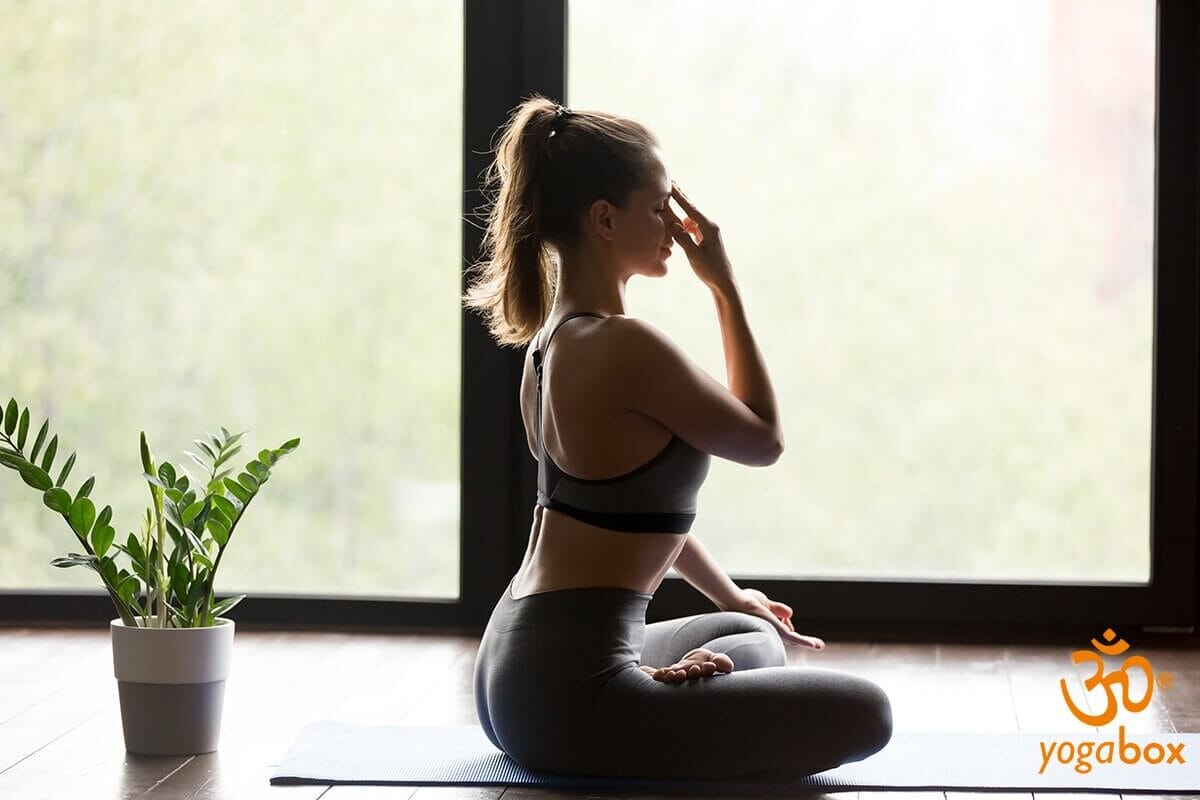
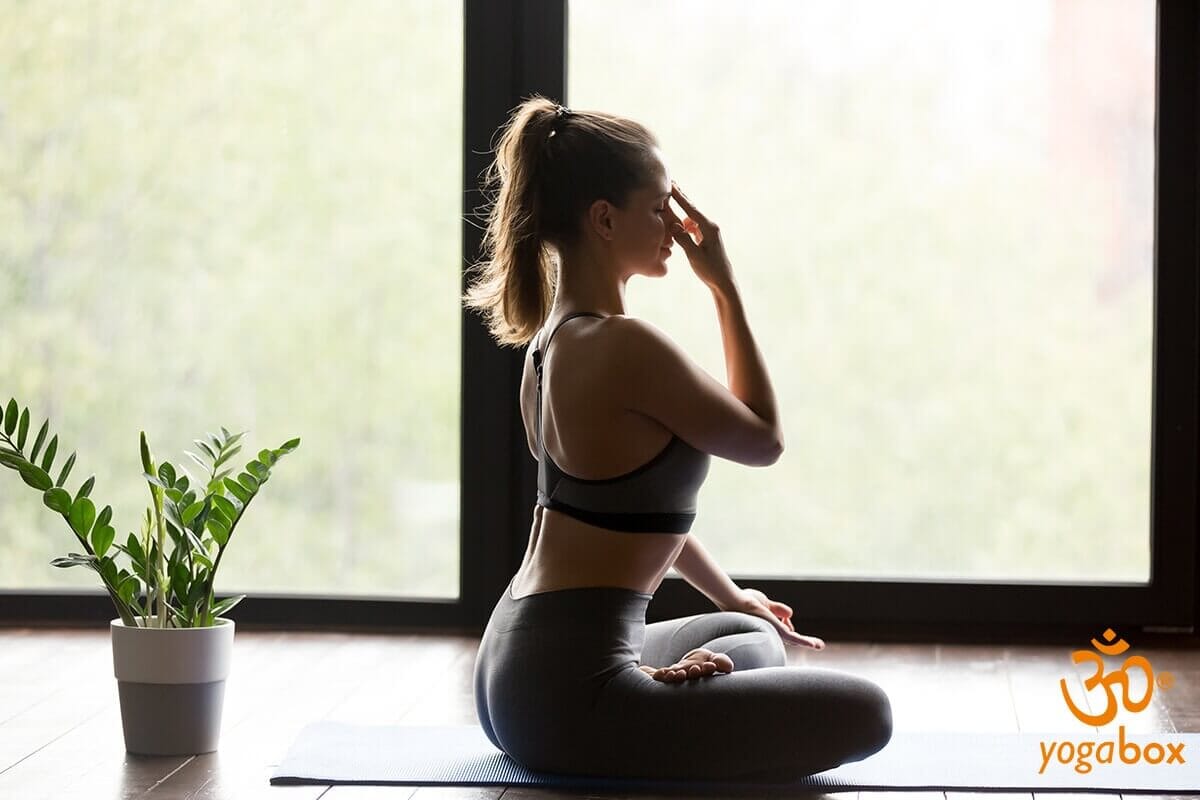
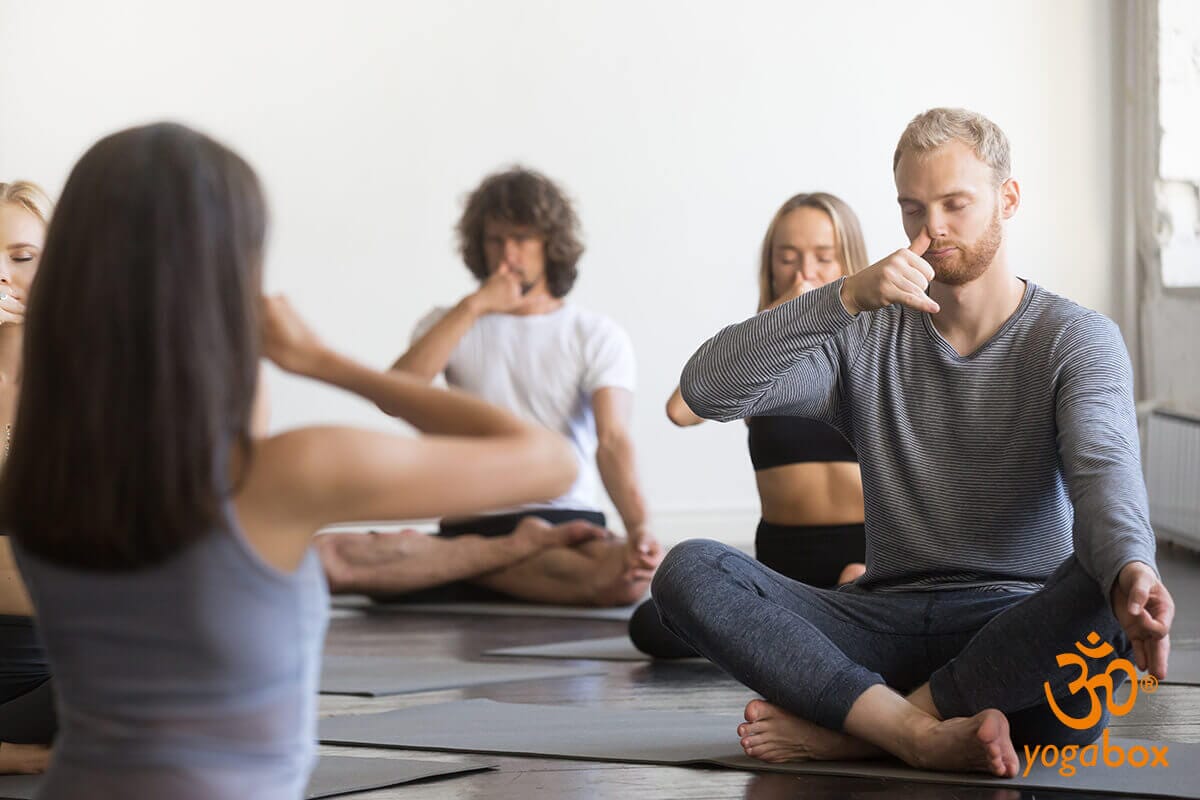
Pranayama - the breathing exercises of yoga - ©iStock.com/energel Inhale… exhale… inhale… exhale… Our breathing is completely automatic and a true miracle. Breath is the fundamental source of our life and gives us energy. With Pranayama, you harness the power of breathing. Depending on the exercise, you can achieve calming or stimulating effects through controlled inhalation and exhalation. Breathing exercises are an essential part of yoga. Along with asanas and meditation, they are part of the regular practice, depending on the yoga style. The various breathing exercises are also an ideal preparation for meditation . In our article, you will learn about the wonderful effects of Pranayama and two popular breathing techniques for directing your energy through conscious breathing. What does Pranayama mean? The word Pranayama translates as the control of the life energy Prana. However, Prana is more than "just the breath." Prana is the immaterial, sometimes considered a subtle, foundation of our existence. In China, it is called Qi (pronounced "chi"), a term surely familiar to everyone, even among non-yogis. Positive results scientifically supported What Asians have known for thousands of years has been at least partially proven by Western science: the connection between breathing, physical fitness, and mental functions. The fact that our mind and body are closely linked is not only known to psychologists. We all experience anxiety and tension, for example, before exams, or that famous moment of shock when we flinch: Our body reacts automatically, an instinctive reflex from our evolutionary history meant to warn us. Consciousness pauses during that second. Our breath often stops for a moment, after which we breathe even more deeply. During exams, it's not quite as extreme, but we might tremble, and our breathing is definitely very shallow. The air then flows only slowly, and we're no longer as efficient due to the lack of energy. This shallow breathing doesn't make things any better, on the contrary: Those who have learned to use their breathing and breathe deeply are much more likely to calm down, organize their thoughts, and will likely handle the exam better. Small Pranayama practice with big impact There are more than 50 different Pranayama exercises. Like yoga exercises , they all serve not only to maintain life energy but also to strengthen it. Science has also made a discovery here: those who control their breath more often not only bring about changes in brain and nerve activity (similar to meditation), but also increase lung capacity – thus improving the oxygen supply to body and mind. This leads to greater concentration, improved memory and organ function, a more energetic metabolism, healthy digestion, and favorable blood pressure. Pranayama is also beneficial during the practice of asanas, because you can use your breath to direct the vitalizing air exactly where you need it during yoga. Body and mind become more efficient overall The list is by no means exhaustive, so let's just say: body and mind become measurably more efficient. One reason for this is that the breath flows more easily and finely, and is less turbulent. Exhalation, the core of every breathing exercise, becomes longer. This allows more toxins to escape from the lungs, creating more space to take in fresh oxygen. The lack of turbulence makes the exchange easier for the lungs. Of course, with deeper breathing, which every practitioner will achieve over time, we also make greater use of the small and tiny alveoli, the numerous air sacs deep within us. Pranayama is easy to learn Breathing exercises are therefore among the most important training elements in yoga. And many of them are wonderfully easy to practice at home and alone . If possible, squeeze in a little exercise every now and then, even if you don't practice yoga much or at all otherwise. Whether in the office or at the tram stop, even the simplest breathing exercises are a great introduction for anyone who wants to try pranayama for the first time. The unfamiliar breathing can occasionally cause headaches and perhaps dizziness. Then it's time to stop immediately and continue later. The more difficult exercises for conscious inhalation and exhalation should initially only be performed under guidance, ideally in a guided yoga class. Otherwise, pranayama can be practiced at least once a day to direct your energy. Sustainable for the entire organism Breathing exercises, along with yoga and exercise, are excellent for combating the ailments of prolonged sitting: back pain and tension in the neck, shoulder, and back muscles. Postural problems and the associated disc problems are also alleviated. This effect is achieved by maintaining an upright posture, sitting upright. No special yoga cushion is required. To begin with, a chair is sufficient, and you sit on it without leaning against it. The simplest method: simply observe your inhalation and exhalation without overpowering them. After just a few seconds, you'll feel a pleasant relaxation throughout your entire body. Pranayama exercises for you Exercise 1: Alternate breathing (Viloma Pranayama) You'll quickly become familiar with alternate nostril breathing in yoga. It's a powerful and easy-to-learn breathing technique, ideal even for beginners. The exercise gets its name from the fact that you breathe in and out alternately through your right and left nostrils. One nostril is closed with your index finger or thumb. Effect of alternate breathing: • Increased well-being • positive effects on body, mind and soul • Cleansing of the respiratory tract • lung volume can be improved • positive effects on the cardiovascular system • Increase concentration • gives new strength and inner peace • Stress is reduced Performing alternate breathing: • Sit comfortably on your yoga mat or a chair. • Make sure you sit upright. • Close the right nostril with your right thumb and breathe in slowly and deeply through the left nostril. • Count slowly to 4 while inhaling. • Now close your left nostril with your index finger, hold your breath and count to 4. • Now open your right nostril and count to 8 as you exhale. • Then repeat the process with the other side of the nose and breathe in through the right nostril and out through the left nostril. Exercise 2: Fire Breathing (Kapalabhati Pranayama) A very well-known and popular pranayama exercise is fire breathing , or Kapalabhati Pranayama. It is one of the activating breathing techniques in yoga and has a cleansing and stimulating effect on your body and mind. It is also frequently used in yoga practice. Kapalabhati is easy to perform and perfect for starting the day fresh and alert. Effect of fire breathing: • Stimulation and cleansing of body and mind • Activation of metabolism • refreshing effect • counteracts exhaustion and fatigue • more energy Execution of fire breathing: • For Kapalabhati, sit in a comfortable position on your yoga mat or a pranayama cushion . The yoga seat or cross-legged position is ideal. If you're not yet flexible enough, sit on a stool or sturdy chair. • Sit upright, your spine should be straight. • Now close your eyes and concentrate on your breathing. • Begin by inhaling through both nostrils. Breathe deeply and slowly into your belly. Fill your lungs completely with air. • Then exhale all the air forcefully through your nose, making a hissing sound. • Repeat the breathing exercise 20 times. • Then, close your eyes and relax a little. • Important: Especially at first, you may feel dizzy due to the unfamiliarity of the exercise. Then continue breathing at your normal rhythm. The more you practice the exercise, the faster your body will adapt to its invigorating effect. Tip: To better feel the effect of this breathing technique, place one hand on your stomach. Visualize the strong flow of air as you exhale to exhale all the air from your body. Conclusion: What does Pranayama do? • has a stimulating or calming effect depending on the breathing technique • better oxygen supply to the body • better concentration • improved memory and organ performance • fitter metabolism • healthy digestion • favorable blood pressure • ideal for preparing for meditation Do you regularly practice pranayama alongside asanas and harness the power of your breath? What's your favorite breathing exercise for strengthening your prana? We'd love for you to share your experiences with our yogabox.de community!
Nadi Shodhana Pranayama - eine der wichtigsten Atemübungen

Shitali Pranayama Discover cooling in the breath

by Stefan on Mar 01 2021
Shitali Pranayama is one of many breathing exercises that yoga offers us. It is considered one of the basic Pranayama variations known as Mahakumbhakas. The term "Pranayama" is certainly familiar to you. It connects "prana," the life energy, with "ayama," control. When we control our breath, life energy is controllable. We influence when we inhale, hold our breath, and exhale. We also influence which parts of the body we direct our breath to. Here you will learn how Shitali Pranayama works, how to perform this breathing technique correctly, and what distinguishes it from other forms of Pranayama. The tongue in focus Shitali Pranayama is a breathing technique in which the tongue is rolled lengthwise. This plays a particularly important role in this form of breathing. The rolling lengthwise ensures that the inhalation occurs with a hissing sound. This is intensified by allowing the tongue to protrude slightly beyond the lips. Inhale through the mouth and exhale through the nose. In the meantime, hold your breath for as long as you can comfortably do so and exhale gently. Learn with a teacher Pranayama breathing exercises should always be learned and practiced with a yoga teacher before continuing the practice at home. Only then can you be sure of fully reaping their beneficial effects. Once you're experienced, you can practice Shitali Pranayama for up to 20 minutes. The best time to do this is in the morning. Sit and breathe comfortably If you want to practice Shitali Pranayama, choose a position where you can remain for a while without being restricted or disturbed. Cross-legged postures are preferable. Examples include the lotus position (Padmasana) or Siddhasana. Cooling through breathing You're probably familiar with dogs: They pant and cool their bodies with their tongues hanging out of their mouths. Shitali Pranayama works similarly. The hissing inhalation through the curled tongue cools you and your body. Cooling always represents calm. Shitali Pranayama provides this for body, mind, and soul. Excessive energies are cooled down to a normal level. In this context, Shitali Pranayama is also closely linked to Ayurveda: Pitta and appetite are normalized. Experience the effects of Shitali Pranayama You can benefit from the cooling effect of this breathing technique for illnesses associated with heat buildup in the body. This includes fever, but inflammation can also be cooled with the help of the breath. The cooling effect is associated with a cleansing of the body. Within the organism, this affects the blood, but the skin and digestive system also experience beneficial effects in Shitali Pranayama. Detoxification of the body is clearly the primary focus of this breathing technique. It can also temporarily reduce hunger and thirst. Breathing also has calming effects on the mind. "Shitali" means "cooling," but also "calming." Harmony can be restored when exposed to warmth or heat. Stress often builds up in heated conversations and heated discussions. "Keeping cool," on the other hand, is an expression that shows that cooling down is closely linked to calming down. A car whose engine has overheated and whose cooling system may no longer be working quite as well as intended is also stressed in a figurative sense. Variations of Shitali Pranayama You can also perform cooling breathing in conjunction with kumbhakas or bandhas. Kumbhaka means you can briefly hold your breath after inhaling or exhaling. Bandhas are locks you can place in your body to channel energy. This is particularly effective when combined with breathing. However, this is a practice that should be learned from an experienced yoga teacher.
Nadi Shodhana Pranayama - eine der wichtigsten Atemübungen

Nadi Shodhana Pranayama - one of the most important breathing exercises

by Nick on Apr 23 2019
Nadi Shodana is one of the most important breathing exercises , suitable for beginners but also for professionals thanks to its highly advanced variations. The goal of the exercises is to renew energy in the shortest possible time. Nadi Shodhana Pranayama also has other benefits. Below, you'll learn what these are, how the exercise works, and what to keep in mind. Nadi Shodhana Pranayama - one of the most important breathing exercises Nadi Shodhana Pranayama - conscious alternate breathing Proper breathing can unleash great healing powers. This was recognized long ago, and practitioners of Nadi Shodhana Pranayama are said to benefit from it. Nadi Shodhana literally means "cleansing the nadis," the energy channels in the body, which should be free of blockages and tension. Only then can energy flow optimally. Nadi Shodhana cleanses the so-called network of nadis, which are tube-like conduits through which pranic energy circulates. By opening the nadis, pranic energy can flow throughout the entire body. How does Nadi Shodhana Pranayama work? The word nadi means tube, shodhana means purifying, and prana is the sum total of all energies. Ayama means expansion and extension, but also stopping and holding back. Nadi Shodhana Pranayama is a demanding but very effective nasal breathing technique that has a very relaxing effect. The nasal passages should be clear. Strictly speaking, it is alternate nostril breathing that works as follows: Sit comfortably in a chair without leaning back. You can also kneel or choose the lotus position. Make sure your back is straight and relaxed. Place your left hand on your thigh, palm facing up. The tips of your index finger and thumb should touch, and the remaining three fingers should be extended. Close your eyes and focus on your inner self. Then breathe in and out alternately through your left and right nostrils. While inhaling through one nostril, close the other nostril and count to five. Hold your breath. Then close both nostrils before inhaling and exhaling again. Count to five as you exhale. Repeat the alternate breathing a few times and then place your hands on your knees. Once you're experienced, you can practice this alternate nostril breathing for up to 30 minutes, or even less depending on your time. If you feel dizzy, stop immediately and gradually increase the pace from there. The counting times can also vary. Alternate nostril breathing is also often used before a meditative exercise because it calms the mind. It can be practiced almost anywhere and at any time, without any aids or special requirements. A quiet moment is enough for a few deep breaths. What are the benefits of Nadi Shodhana Pranayama? Alternate nostril breathing (Nadi Shodana) promotes inner balance, increased peace , serenity, joy, and harmony, as well as mental concentration . It is intended to create emotional balance and eliminate fears and insecurities. Nadi Shodhana Pranayama is also said to harmonize all bodily functions, prevent colds and allergies, and improve nasal breathing. The exercise is also a good cardiovascular workout. Lung capacity can also be optimized, thus having a positive effect on conditions such as asthma. Summary Alternate nostril breathing is called "Nadi Shodhana." This translates as a cleansing exercise, and this is precisely the focus of this healing breathing exercise. It's about allowing energies to flow, cleansing the energy body, and elevating the energy centers. Breathing should always be light and effortless, as it is, after all, a relaxation technique. Find your own rhythm and breathe in and out slowly and calmly. Assume your desired meditative sitting position and maintain an upright, comfortable posture. Nadi Shodhana unfolds its healing effects on physical, energetic, and mental levels. Image © fizkes / 123rf.com
Viloma Pranayama Reinigung in der Wechselatmung

Viloma Pranayama: Cleansing through alternate breathing

by Nick on Apr 19 2019
Pranayama, or breathing exercises, are an essential part of yoga practice, alongside asanas, relaxation, and meditation. Viloma Pranayama, or alternate nostril breathing, is very well-known in this context and is often taught even in beginner's courses. Once you've learned it under the guidance of a yoga teacher, you can also practice it regularly at home. Here you'll learn exactly how Viloma Pranayama is performed, what to pay attention to during this practice, and what benefits this breathing exercise can offer you. Viloma Pranayama cleansing in alternate breathing Alternate breathing and its prerequisites In the context of breathing, alternation means alternating between the right and left nostrils for breathing. To do this, sit comfortably on your mat (or on a chair). If you're sitting on the mat, you can do this with your legs crossed, for example. Kneeling is also suitable for Viloma Pranayama. The main thing is that you can fully concentrate on the breathing technique . This is especially possible if you can relax and close your eyes during Pranayama. Breathe alternately on the right and left Alternating between the right and left nostrils is made possible by closing them with your fingers. Bring your right hand to your nose so that you can close the right nostril with your thumb and the left nostril with your ring finger. First, close the right nostril with your thumb and breathe in evenly through the left nostril. Count slowly to 4 in your head and make sure that you fill about 75 percent of your lungs with oxygen. Now close the left nostril as well and, holding your breath, count to 4 again. Then open the right nostril and breathe out for a count of 8. Empty yourself, which will prepare you for the next inhalation. Now everything happens in reverse. Inhale through the right nostril and exhale through the left. Regular practice You can practice alternate nostril breathing for three sets, or even up to eight. Experienced yogis can also practice alternate nostril breathing for half an hour. You can practice alternate nostril breathing every day. Learn about the effects of alternate breathing Viloma Pranayama can provide a multitude of beneficial effects for your well-being . These encompass body, mind, and soul, making alternate breathing a holistic experience. On the physical level, cleansing the respiratory tract is paramount. This can be helpful if you suffer from an allergic condition such as hay fever or asthma. Viloma Pranayama can also help prevent colds , especially during the winter months. Clearing your nasal passages also helps with your yoga practice: You can direct your breath exactly where you want it during individual asanas. Alternate nostril breathing can significantly improve the volume and thus the capacity of your lungs. The cardiovascular system can also noticeably benefit. In the mental realm, Viloma Pranayama is an exercise that can sustainably improve your concentration. If you've decided to meditate, alternate nostril breathing is a good preparation. It helps you calm down and focus on what's important. If you're feeling anxious or restless, it can give you new strength. Gathering new energies Viloma Pranayama can noticeably activate the energies in your body. Alternate nostril breathing is also known as Nadi Sodhana, or cleansing the nadis. Nadis are small energy channels in your body. It is said that you have 72,000 of them. Through alternate nostril breathing, these channels are cleansed, allowing the prana to spread freely within you. The life energy that flows through you strengthens you for everyday life. Viloma Pranayama also addresses your higher chakras . Just try it out and see how alternate nostril breathing works for you and how long these effects last! Image © fizkes / 123rf.com

Pratyahara: the fifth limb in Raja Yoga

by Nick on Jul 07 2018
Pratyahara: the fifth limb in Raja Yoga Pratyahara: the fifth limb in Raja Yoga For people who are new to yoga, yoga practice primarily consists of physical exercises, the asanas. But yoga is, of course, much more, as anyone who delves deeper into this millennia-old tradition will recognize. The fact that yoga embraces body, mind, and spirit equally is particularly evident in Raja Yoga (Asthanga Yoga). It has eight limbs, which Patanjali describes in his Yoga Sutras. Pratyahara is the fifth limb in the eight-limbed system of yoga. Here you can learn more about its classification, practice, and effects. The eight limbs of Raja Yoga Raja Yoga consists of the following limbs: Yama : dealing with others Niyama: the attitude towards oneself Asana: the physical exercises Pranayama : the breathing exercises Pratyahara: withdrawing the senses Dharana: concentration Dhyana: absorption during meditation Samadhi: the superconsciousness The stages of Pratyahara will not be explained further here. The point is simply to help you understand how Pratyahara fits in and that yoga considers body, mind, and soul as a whole. Pratyahara: the withdrawal of the senses Pratyahara, like many yoga terms, comes from Sanskrit. The word means "retreat from battle." Even though it's not military-related, the image is somewhat appropriate for today's world. We're often overwhelmed by sensory impressions and thoughts. The "war" that rages in our minds causes stress. Therefore, Pratyahara is an essential building block when it comes to our well-being. When nothing is bombarding us anymore, when our "inner troops" have withdrawn, we often feel the peace and relaxation we've long sought. Characteristics of Pratyahara This fifth limb in the eight-limbed path has several characteristics. First, it is the withdrawal from sense objects. In yoga, this refers to everything we can perceive with the senses: everything we can see, hear, taste, smell, or touch. Another characteristic is the withdrawal from our perception. This means that we do not allow any sensory impressions in this state at all. The third characteristic is the withdrawal from attachment. This involves not allowing the mind to become active. Pratyahara in everyday life and meditation In your daily life, you continually incorporate the fifth limb of Raja Yoga. This is, of course, only possible once you have gradually developed an awareness of this state. You can also incorporate it into meditation. Here, you might recall your first yoga classes, where you were supposed to sit in silence and allow any thoughts that arise to pass by without judgment. Preparation is necessary. Pratyahara is the fifth limb of Raja Yoga for a reason. You should only begin these practices once you are somewhat familiar with the previous stages. It is also helpful to have a yoga teacher with solid spiritual practice at your side. Discipline and perseverance are very important in the beginning. The more you try not to focus on something, the more likely you are to do it in the beginning. Withdraw the senses one by one Withdrawing all the senses at once is almost impossible. Therefore, there's a rule of thumb for how to best achieve Pratyahara. This involves the wildest sense. It's the one that's most active in you individually. Concentrate on gradually reining in this sense. Once you succeed, you can add the next sense to your practice. Force is absolutely essential. The important thing is to withdraw the senses gently, so as not to draw the mind's attention to them and refocus. Image © deklofenak / 123rf.com

Mula Bandha: How to keep your energies circulating

by Nick on Jun 19 2018
Mula Bandha: How to keep your energies circulating In yoga, three power centers of the body are defined: the bandhas. The word bandha, translated from Sanskrit, means something like "lock" or "seal." Bandhas are central bodily locks that have a special function: They direct, regulate, and preserve the body's energy. Through yoga postures and breathing exercises, prana, the life force, is activated. It should serve your body as optimally as possible—by activating your bandhas, you contribute to this optimal use. In yoga language, this activation is called "setting bandhas." Setting occurs through finely measured muscle contractions. The highest bandha in the body is the Jalandhara Bandha, the neck lock . The abdominal contraction is called Uddiyana Bandha . And Mula Bandha stands for the root lock, the pelvic floor contraction. The contractions should not be understood as the strongest possible contractions, but rather as precisely coordinated and targeted muscle contractions that can only be used beneficially through experience and persistent practice. Mula Bandha can give you support Mula Bandha addresses the root chakra , the pelvic floor in the perineal region between the anus and genitals. The pelvic floor consists of the perineal muscles as the outer layer, the urogenital diaphragm (diaphragm) in the middle layer, and the pelvic diaphragm in the inner layer. Activating the pelvic diaphragm, as the muscular connection between the pubic bone and coccyx, is of utmost importance in Mula Bandha. When performed correctly, the root closure can provide a stable foundation for your spine. It thus creates a reliable foundation for all healthy postures. It can also powerfully support yoga breathing exercises. In Hatha Yoga, the root area in particular is considered a body area that provides you with security and support, not only in a physical sense. Regular practice of Mula Bandha prevents your body's energy from flowing downward. The energies rise within you with undiminished strength. This can have a revitalizing effect and fill you with energy and zest for life. If you practice Mula Bandhas regularly, you can experience further physical and mental benefits. Root locking can stabilize your sacroiliac joint and prevent inflammation in this area. Mula Bandha can also help with incontinence and pain during intercourse. It is considered to promote circulation and potency, as well as calm the autonomic nervous system and relax your mind. However, contraindications are also described in connection with Mula Bandha. It should be avoided in cases of acute inflammation in the pelvis, coccyx injuries, and after pelvic floor surgery. Likewise, women who are pregnant or have recently given birth are advised not to practice root locking. Finely dose contractions Mula Bandha can be practiced standing or in a meditation position. Many instructions advise beginners to imagine they urgently need to go to the toilet and cannot. This is certainly a good analogy to get an idea of which muscle groups you should contract during Mula Bandha. By tensing the pelvic floor muscles, you draw your pelvic floor inward and upward. At the same time, the lower back lengthens, and the tailbone and sacrum are drawn downward in the countermovement. Experienced yoga teachers say that as you practice Mula Bandha, the feeling for the contraction becomes increasingly finer and more precisely measured. There are also exercise instructions that combine the establishment of the root lock with the yoga breathing technique of Pranayama. By combining breath and contraction, you may develop an even more precise understanding of this locking technique. Mula Bandha and Pranayama In the meditation position, exhale fully and deeply. As you do so, visualize your pelvic floor as a triangular surface (some say: a taut cloth). At the end of your exhalation, feel the pelvic floor (the cloth, the triangular surface) bulge outward. As you inhale, continue to hold this bulge. In this way, your breathing practice naturally connects you with the correctly measured pelvic floor contraction—a seamless combination of breathing practice and Mula Bandha. Image © dimol / 123rf.com

Bhastrika Pranayama: Breathing like the bellows

by Nick on Jun 14 2018
Bhastrika Pranayama: Breathing like the bellows Pranayama, or breathing exercises, are essential elements alongside asanas, meditation, and relaxation , elements you're surely familiar with from your yoga practice in class or at home. Yogic breathing also comes in various forms. Like the asanas, they have different effects. One of these breathing forms, which has a long tradition, is Bhastrika. Bhastrika Pranayama is an ancient breathing method that translates as "little bellows" in Sanskrit. Here you'll learn how to use Bhastrika Pranayama correctly, what you should keep in mind, and what benefits this breathing practice can bring you. Firm inhalation and exhalation Bhastrika Pranayama means that both inhalation and exhalation are performed very intensely. The whole process occurs very quickly, in between five and ten breathing cycles. If performed correctly, a distinct hissing sound will be audible. The Bhastrika Pranayama cycle ends with an exhalation, which should be as deep as possible. This is followed by a holding position in which you activate all three bandhas: Mula Bandha, Uddiyana Bandha , and Jalandhara Bandha . After a short rest, you can repeat this process. Three cycles are recommended. Healing effects The healing effects of Bhastrika Pranayama are already mentioned in the Hatha Yoga Pradipika. This breathing exercise can be particularly helpful for the respiratory system. It is used for inflammation in the throat and pharynx, but also for asthma and nasal congestion. The exercise can remove mucus from the body, allowing you to breathe freely again. Bhastrika Pranayama can also be helpful for constipation. This form of breathing can sustainably strengthen the digestive fire in your body. You can support this process even more with a targeted diet. For example, in Ayurveda, there are foods that further ignite the digestive fire. Preparation is important Bhastrika Pranayama is one of the advanced breathing exercises. It's best to prepare for it slowly, preferably with the support of an experienced yoga teacher you trust. First, you should have incorporated asanas into your daily practice. The consumption of alcohol, drugs, or nicotine is not suitable for yogic breathing in Bhastrika Pranayama. Diet is a key factor in Pranayama practice. A vegetarian diet without meat and fish is important. Furthermore, as a yogi, breathing practice is ideally something you'll have practiced for a long time. Alternate nostril breathing, which you can learn relatively early in a yoga class, is often an important building block on the path to Bhastrika Pranayama. Kapalabhati , a firm inhalation followed by a gentle exhalation, will also help you prepare. Bhastrika Pranayama and Meditation Bhastrika, as a form of pranayama, is a way to expand your consciousness and should therefore be incorporated into your spiritual practice. It serves to activate Kundalini , the serpent at the base of your spine, which is the subject of your creative powers. Your meditation will also likely improve through pranayama based on Bhastrika. The more you free yourself from impurities, expand your consciousness, and allow prana to flow, the closer you come to experiencing the Divine. You will discover your Self and a greater sense of balance in your life. Your path to Bhastrika Pranayama If you want to practice this pranayama, you need a quiet place because of its spiritual nature. Sit in the lotus position (Padmasana) and maintain an upright posture. It's best to practice in the morning, but it's also possible in the evening. It's important to interrupt your practice if you feel dizzy and return to your normal breathing rhythm. It's also better if the environment around you is cool, but definitely not too hot. If you start to sweat, this is a completely normal process with this very special form of pranayama. Image © fizkes / 123rf.com

Kumbhaka: holding the breath in yoga

by Nick on Dec 01 2017
Kumbhaka: holding the breath in yoga As a yogi or yogini, you know that yoga consists of several elements, such as asanas, breathing exercises , relaxation, and meditation. Among the classic breathing exercises you may encounter during your yoga classes is Kumbhaka, the conscious holding of your breath. Here you'll learn everything you need to know about this beneficial and effective breathing practice. In yoga, your yoga teacher will likely often encourage you to take a full breath. This breath, at its beginning and end, marks the two main times you can use the yogic breathhold: Bhaya Kumbhaka means holding your breath at the end of a conscious exhalation. Antara Kumbhaka, on the other hand, is holding your breath after a full inhalation, i.e., when your lungs are full. Yoga also offers a third variation: In Kevala Kumbhaka, you consciously breathe shallowly, but without interrupting your rhythmic breath flow by holding your breath. Your body as a "vessel" Like many other asanas and practices, the name Kumbhaka comes from Sanskrit. The word means "holding the breath," but also "breathing exercise." The word "kumbha" is important for a better understanding of the targeted control of breath. It means "vessel" or "pot" and shows you that your body is a space that you can consciously fill with breath or energy. In this context, you are probably already familiar with the terms "prana" (life energy) or "pranayama" (conscious breathing) in your yoga practice. Conscious or unconscious breath holding during Kumbhaka Some things in yoga happen intentionally and controlled, others completely automatically. Breathing pauses in yoga practice can also be divided into two types in this context. First, there is Sahita Kumbhaka. This is the breathing pause we just introduced to you: consciously holding your breath at the end of an exhalation or inhalation. Once you have mastered this, there is also the possibility that the breathing pause can occur naturally at any point in your breathing cycle, without you having to force it or even try to force it. This breath holding is called Kevala Kumbhaka. It is an important step on the path to perfect mind control, as described in Raja Yoga . Beneficial effects on body, mind and soul Especially when you pause for breath while your lungs are full, you experience a multitude of positive effects on your body and mind. All your organs are enriched not only with oxygen but also with life-giving energy, prana. This ensures that all metabolic processes in your body are vitalized. Your muscles, digestion, cardiovascular system, and nervous system benefit from this. Furthermore, the volume of air your lungs can hold is increased. Another bonus for your well-being: your immune system can be sustainably strengthened. At the beginning there is mindfulness A gentle approach to Kumbhaka is to first observe your own breathing. You can do this by sitting or lying in silence in a comfortable position. Observe your natural breathing rhythm without trying to influence or judge it in any way. Over time, you will notice that your breath pauses briefly both at the end of the inhalation and after the exhalation, before then returning to its own, unique rhythm. When you recognize this, you have already developed a good feeling for your breathing. This awareness provides a solid foundation for experiencing the relaxing effects of Kumbhaka. Here's a quick tip: Many yogis find it easier to hold their breath while inhaling, meaning with full lungs. But no matter how you gradually approach Kumbhaka, you should always ensure a calm atmosphere and avoid practicing on a full stomach. Gradually make the breathing pauses a little longer, always as you feel comfortable. Image © madrabothair / 123rf.com

The Vishnu Mudra for cleansing the energy channels

by Nick on Nov 22 2017
The Vishnu Mudra for cleansing the energy channels Vishnu Mudra is a pranayama exercise, a breathing exercise in the category of balancing alternate nostril breathing. Alternate nostril breathing is called "Nadi Shodhana" in Sanskrit. Translated, this means "cleansing the nadis," where nadis refer to the energetic channels in the subtle body. The nadis must be free of blockages and impurities so that prana, or energy, can move freely. Only then can we experience joy, balance, and harmony. To practice Vishnu Mudra, the index and middle fingers are bent toward the ball of the thumb. The ring fingers, thumb, and little fingers are spread apart. The thumb and ring fingers are used to alternately close the nostrils to support alternate nostril breathing. Incidentally, Vishnu Mudra is named after an important Hindu god. Vishnu is the protector of the world, who ensures that the universe is kept in balance. In this respect, the name of the mudra can also be derived from the effect of the alternate breathing that is regularly applied with it, in which the energetic and physical energy flow is kept in optimal harmony. Vishnu Mudra in practice The Vishnu Mudra hand position is used in the active nostril breathing exercise in yoga. As already described, the index and middle fingers of the right hand are curled toward the palm, while the remaining fingers remain spread out. The thumb and ring finger are gently placed on either side of the nose. While inhaling through the left nostril, the practitioner closes their right nostril with their thumb. The subsequent exhalation occurs through the right nostril, which is then released. At the same time, the left nostril is closed with the ring finger. After inhaling through the right nostril and exhaling through the left, the alternate nostril breathing cycle is completed. Variations of Vishnu Mudra This pranayama is repeated several times after completing a cycle of alternate nostril breathing. Different techniques can be used. One of these is alternate nostril breathing without breath retention, i.e., breathing without pauses. Many people find this technique more comfortable, as some feel tightness when holding their breath. A good breathing rhythm is to count to five while inhaling. The exhalation occurs without pause, but for a longer time than the inhalation. Ideally, you should quietly count to 10 while exhaling before continuing with the short inhalation. Nadi Shodhana with breath retention is practiced with pauses in between, although this breath retention can be held for different lengths of time. One possible breathing rhythm is to count to three during the full yoga inhalation, then close both nostrils with the ring finger and thumb and count to twelve, and then exhale for six seconds. This type of alternate nostril breathing can have different proportions. A basic rhythm of inhalation-breath retention-exhalation, for example, is 1-4-2. Alternate nostril breathing with Vishnu Mudra can also be performed with a rhythm of 3-6-3, 4-16-18, or even 5-20-10. When practicing alternate nostril breathing with or without pauses, it is important that the practitioner feels comfortable. If you feel unwell or dizzy, you should immediately stop alternate nostril breathing and return to a normal rhythm. It is best to begin alternate nostril breathing with Vishnu Mudra slowly, without pauses, and with a shorter breathing rhythm, gradually increasing the intervals and pauses as your practice progresses. Effect of Pranayama Vishnu Mudra Vishnu Mudra is said to have several positive effects. This pranayama supposedly balances the right and left sides of the brain, improving concentration and preparing for subsequent meditation. The astral energy channels are cleansed, allowing energy to flow freely again. Furthermore, the practice of Visnu Mudra calms the mind and reduces stress. Deep and slow breathing, especially when combined with breath retention, improves energy levels, as life energy can be better absorbed with slow breathing and breath retention. Most yogis feel refreshed, rested, centered, and energetically recharged after practicing Vishnu Mudra. Image © fizkes / 123rf.com

Surya Bhedana Pranayama - the sun breathing

by Nick on Oct 17 2017
Surya Bhedana Pranayama - the sun breathing Surya bhedana pranayama should be performed in the morning, as this yoga exercise makes you alert and energized. It can improve your thinking and reaction time, while also improving your mood and alleviating depression. Thus, with Surya bhedana pranayama, you'll ensure a successful start to the day. What exactly is surya bhedana pranayama? Surya bhedana pranayama is a breathing technique in which you inhale through your right nostril and exhale through your left nostril. This breathing exercise aims to increase solar energy, which is also considered hot energy. Therefore, surya bhedana pranayama is also called solar breathing. If you often have cold hands or feet, you should do this exercise to warm yourself up. It strongly activates solar energy. It is responsible for activity and physical movement. How is surya bhedana pranayama performed? You sit in Siddhasana , Bhadrasana , or Padmasana . Simply choose what is most comfortable for you and close your eyes. Then form the Vishnu Mudra with your hands and close your left nostril with the little finger of your right hand. Now breathe in deeply and slowly through your right nostril and close it with your thumb. Count to two as you inhale. Then hold your breath and practice Jalandhara Bandha, counting to eight. Press your chin against your ribcage. Concentrate on your skull and the top of your head to channel the energy into it and cleanse it. The roots of your hair and fingertips will begin to sweat. You won't achieve this right away. Gradually increase the breath-hold time until it's optimal. Always hold it for as long as is comfortable. To exhale (without bandha), open your left nostril. Exhale through it and count to four. Repeat this exercise in the same form up to five times. What positive effects can you achieve through surya bhedana pranayama? This breathing technique activates the sympathetic nervous system. It can help raise low blood pressure. It warms the muscles and opens the nasal passages, allowing you to breathe through both nostrils. Surya bhedana pranayama can help with sinus problems and contribute to the prevention of hay fever, colds, and bronchial asthma. This yoga practice can also kill intestinal worms, eliminate intestinal diseases, and help with gas in the gastrointestinal tract. It can also provide relief from rheumatism, tension-related headaches and migraines, as well as various types of neuralgia. The breathing technique also has positive effects on the mind. Sun breathing awakens the mind and increases responsiveness. It promotes clear, logical, and analytical thinking. New energy is absorbed and the nerves are strengthened. Surya bhedana pranayama can lift the mood and improve depression. For whom is surya bhedana pranayama not suitable? People who are very nervous, aggressive, or overactive should not practice this breathing technique, as this can exacerbate these tendencies. The same applies to situations in which you are agitated or internally tense due to certain events. In these cases, you should also avoid it. Furthermore, Surya Bhedana Pranayama is not suitable for people suffering from high blood pressure or fever. It will further increase the heat in the body. It is also not recommended during menopause, as hot flashes can increase significantly for the same reason. This technique is also not suitable for diarrhea. Conclusion Surya bhedana pranayama calms the mind and has many other positive effects. Make sure you breathe through your right nostril. Gradually increase the intensity. If you find it easier, you can even do the exercise without kumbhaka, or breath retention, or jalandhara bandha, or throat lock, at the very beginning. Just experiment and see if the breathing technique becomes easier for you. You can then integrate it into the practice over time. Image © dimol / 123rf.com

Fire Breathing - Kapalabhati Pranayama

by Nick on Sep 25 2016
Fire Breathing - Kapalabhati Pranayama Kapalabhati Pranayama, or fire breathing, is one of the activating breathing techniques in yoga. It has a stimulating and purifying effect on mind and body. Fire breathing is used, among other things, to stimulate the metabolism and keep the mind alert and active. Its uplifting and invigorating effect can help relieve exhaustion and fatigue. Kapalabhati Pranayama is easy to perform. It's the ideal breathing exercise for the morning to wake you up and get you ready. Benefits of Kapalabhati Pranayama The breathing technique creates a warm feeling in the body and activates the circulation. You'll likely feel more awake after the exercise. By stimulating the entire metabolism, toxins and waste products are better eliminated. Fire breathing is also said to promote digestion and detoxify the liver and kidneys. This practice can help with gastrointestinal problems or constipation. Women, in particular, appreciate fire breathing as a beauty treatment because it stimulates overall blood circulation. This can reduce dark circles under the eyes, making the eyes appear alert and focused. Important instructions: Vatakrama Kapalabhati is one of the most powerful breathing techniques in yoga. Therefore, it cannot be practiced by everyone. People suffering from high blood pressure, heart disease, or epilepsy should not perform the exercise. This also applies to people who have already suffered a stroke. Fire breathing is also not recommended for those with problems related to excessive stomach acid, such as heartburn or stomach ulcers. Three types of Kapalabhati The word Kapalabhati comes from Sanskrit. It is composed of the two words Kapal and Bhati. Kapal translates as skull. It is interesting to note, however, that in Indian yoga, the skull refers not just to the bone, but to the entire head, including the brain. The word Bhati translates as enlightenment or illumination. Kapalabhati can therefore be roughly translated as enlightenment of the head or mind. Pranayama means breathing. In yoga, there are three types of Kapalabhati. Vatakrama Kapalabhati is commonly used as Kapalabhati Pranayama. Vatakrama Kapalabhati This is the most widely practiced Kapalabhati breathing exercise. It's a simple technique in which the exhalation is very active, while the inhalation is almost passive. Breathing is reversed from normal breathing, since with normal breathing we inhale actively and exhale passively. Vyutkrama Kapalabhati In this yoga exercise, you draw water in through your nose, let it flow into your mouth, and then spit it out. Sheetkrama Kapalabhati This exercise is the reverse of Vyutkrama Kapalabhati. The water is first drawn into the mouth, then drawn up into the nose and expelled through the nose. How to perform fire breathing You can perform fire breathing in any sitting position, but the yoga position or cross-legged position are recommended. If you're not yet very flexible, you can simply sit on a stool or sturdy chair . Just make sure your spine is straight and upright. Close your eyes and concentrate fully on your breathing. To better feel the effects of the breathing technique, you can place one hand on your stomach. Now breathe in deeply and slowly through both nostrils until your lungs are completely filled with air. Your stomach will bulge slightly. Now exhale forcefully through your nose. Imagine the air escaping from your entire abdomen. As you exhale, you may feel some pressure in your stomach. As you exhale, make a hissing sound. Imagine the energy flowing out of your nose. Repeat this breathing exercise 20 times in total; the entire process should take about 5 minutes. After the breathing exercise, sit for a while with your eyes closed to relax a little. Image © dimol / 123rf.com

Candra Bhedana, the moon breathing

by Nick on Sep 21 2016
Candra Bhedana, the moon breathing Moon breathing is a popular yoga exercise that helps you relax. It is therefore one of the calming breathing techniques. The word Chandra translates as "moon." The word Bhedana can be translated as "to break out" or "to break through." The yoga term for this breathing technique is Pranayama . Therefore, the correct name for Moon breathing is Chandra Bhedana Pranayama. We breathe through two nostrils; in yoga, the two nostrils are called nadi. The right nostril is called the Surya nadi, and the left nostril is called the Chandra nadi. The left nostril is therefore the center of lunar breathing, and in yoga, it is referred to as the lunar nostril. Benefits of Chandra Bhedana Pranayama Chandra Bhedana Pranayama is a simple and effective relaxation technique. The moon symbolizes coolness and calm; it is the counterpart to the sun, which represents fire, warmth, and energy. In Ayurveda, moon breathing is recommended whenever Pitta needs to be reduced. So, if you're agitated and have too much fire within you, moon breathing can help you bring yourself back into balance. This breathing technique is recommended for emotionally agitated states, for example, when you're angry, irritable, or frustrated. Moon breathing can, of course, be practiced at any time of day, but it's especially popular in the evening for relaxation. If you have trouble falling asleep, try Chandra Bhedana before bed. The exercise can help you fall asleep more easily. Many people also benefit from its calming effect in particularly stressful situations, such as before an exam. Moon breathing can help you concentrate when you're nervous. The benefits of Chandra Bhedana Pranayama at a glance: Moon breathing reduces Pitta. It helps you calm your mind and body and relax. If you are stressed, angry, tense, or irritable, this exercise can help. You can use Chandra Bhedana to prepare for an exam or to see if the technique helps you concentrate better (for example, when studying). The breathing exercise is intended to reduce body heat and is therefore also recommended for fever. In Ayurveda, moon breathing is used to treat high blood pressure and reduce bile flow. Important instructions: Chandra Bhedana Pranayama can be practiced by most people. However, people who suffer from asthma or low blood pressure should not perform the exercise without consulting their doctor. If you have a cold, you cannot perform the exercise. Instructions: How to perform moon breathing Like most breathing exercises, moon breathing can be performed in any sitting position. We recommend sitting in a yoga position or cross-legged . If that's not possible, you can simply sit on a chair or stool. Make sure you're sitting upright with your back straight. Bring the fingers of your right hand into the Pranayama Mudra position, pressing your index and middle fingers towards your palms. Bring your right hand to your face and close your right nostril with your right thumb. Inhale slowly and deeply through your left nostril until your lungs are filled with air (about 4 seconds). Hold your breath for a short time, about 4 seconds. Release your thumb from your right nostril and close your left nostril with your right ring finger. Now exhale slowly through your right nostril. The exhalation should take longer than the inhalation. Repeat the entire process ten times. You can practice moon breathing as needed, for example, in the evening to relax or as part of a yoga class. Chandra Bheda is not usually practiced daily, but only when Pitta is in excess or when there is nervous or mental tension. Image © fizkes / 123rf.com