Yoga BLOG

Virabhadrasana I - der Krieger I - für mehr Entschlusskraft und Selbstbewusstsein

Virabhadrasana I - the Warrior I - for more determination and self-confidence

by Nick on Feb 19 2019
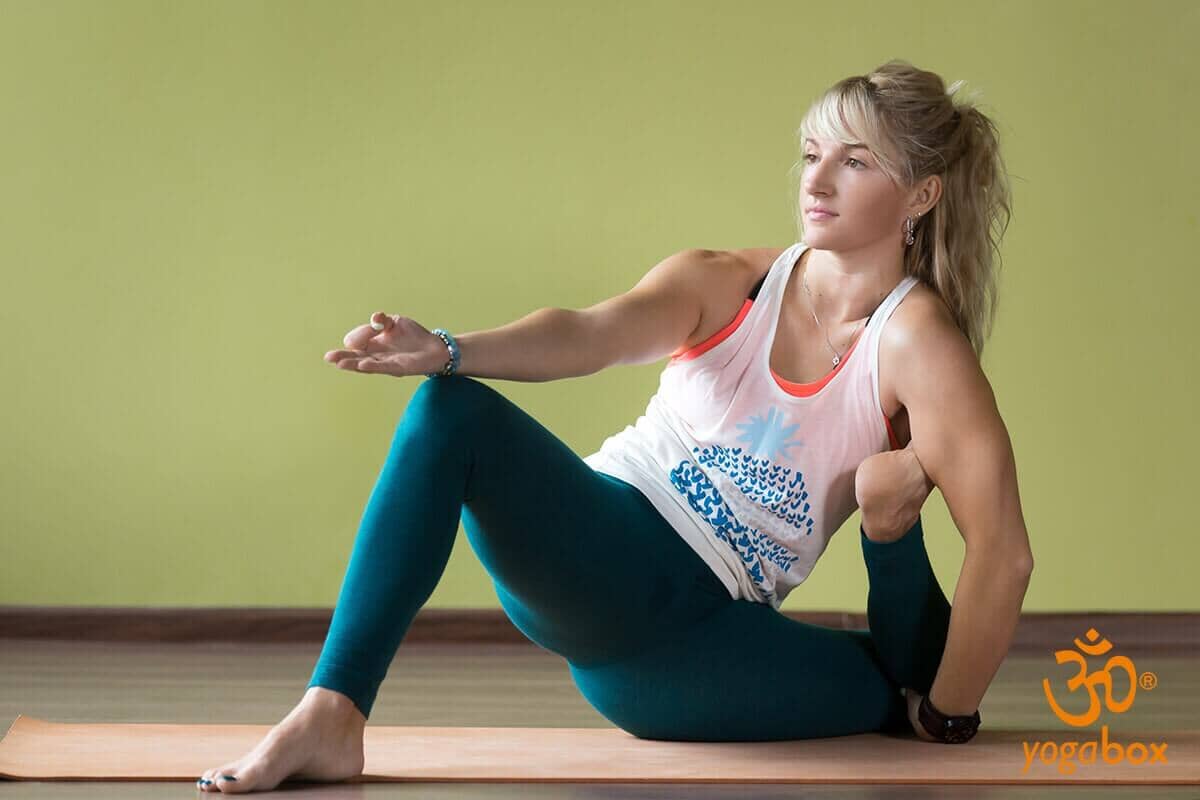
There are three variations of Yoga Warrior, all of which are very powerful. Virabhadrasana I, or Warrior I, is known as the pose of the good hero. The goal of this asana is to strengthen the thigh and gluteal muscles, build inner strength, and increase determination. You can practice this standing pose in the Vidya basic series, initially after Sun Salutation, or at the end after Trikonasana (Triangle) . Virabhadrasana I can also be practiced by yoga beginners, but is considered an intermediate yoga exercise. You will now learn how to perform the exercise and what to keep in mind. Virabhadrasana I - the Warrior I - for more determination and self-confidence Virabhadrasana I - Warrior Virabhadrasana I - what exactly is behind it? 
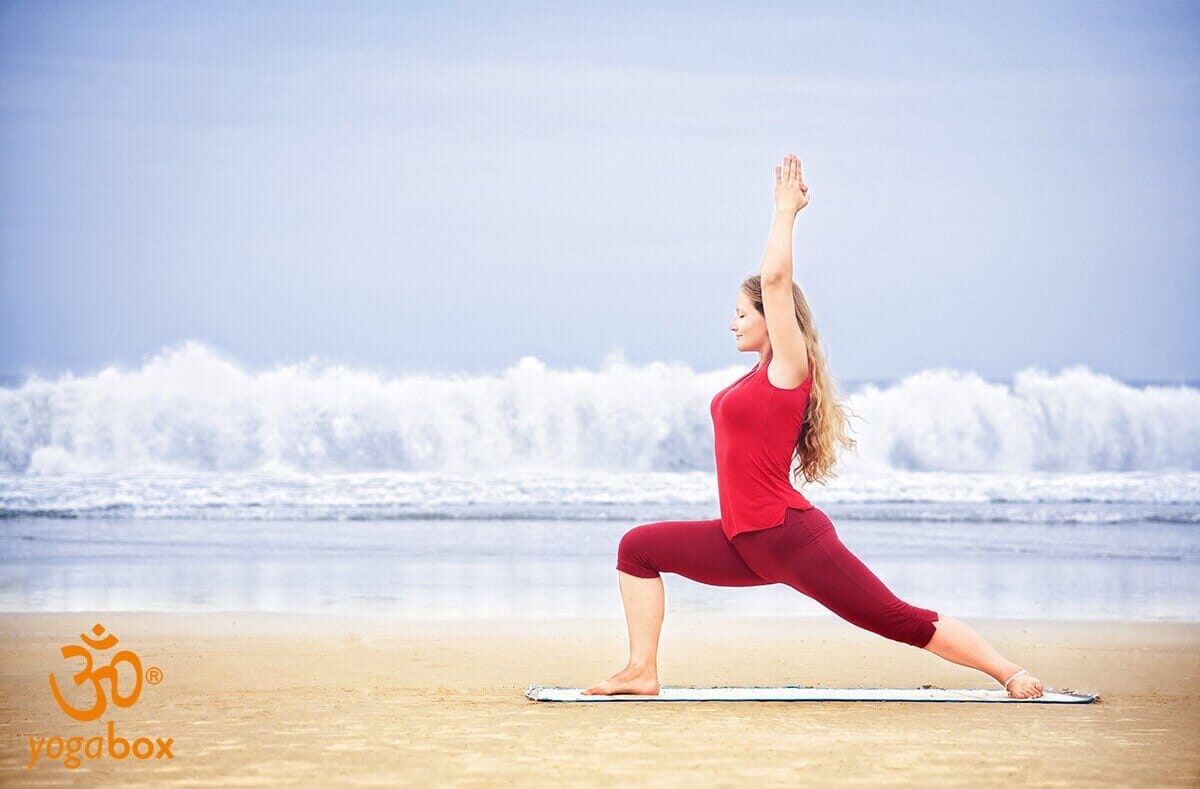
Virabhadrasana I, a standing pose, was named after a warrior from Indian mythology . The word Virabhadrasana is derived from Virabhadra, the hero who plays an important role in South Indian mythology. He fights for good. The starting position for all the poses in the hero series is the tree pose. Many people feel more confident through this asana. The power in this yoga pose comes from a standing position. It is channeled into your arms and beyond. How to perform Virabhadrasana I? Step-by-step instructions: Stand upright and take a big step about one leg length apart. Step your right foot back. Stand in a lunge position with your hips pointing forward. Turn your back foot outward about 60 degrees. On the next exhale, bend your front leg . Place your feet shoulder-width apart, with your knee directly over your ankle. The swords, symbolized by the powerfully upwardly stretched arms and hands, pursue the goal of gaining determination and energy and of growing beyond oneself when performing the exercise. Your arms should be parallel to each other, with your palms facing inward. If you have shoulder pain, your arms don't have to point upward. You can also hold them outward. Don't tense your shoulders; keep them relaxed. Lean your head back, look down at your hands, and breathe in and out calmly. Stay in Virabhadrasana I for 30 to 60 seconds. If you have neck problems, you can also look forward instead of up. To exit the asana, place your arms on your hips, take a small step forward with your back foot, exhale, and relax your arms beside your body. Then repeat Warrior I on the other side. Virabhadrasana I requires concentration, inner calm, and stamina. If you tend to arch your back, make sure you raise your arms to the sides above your head. This will make it easier to keep your back straight. Make sure you breathe consciously. What physical and mental benefits can you achieve with Virabhadrasana I? Raised arms create more determination, energy, stamina, and self-confidence. They can help you surpass yourself. Virabhadrasana I also stretches the shoulders, back, neck, abdomen, and groin. It can also improve balance and equilibrium, increase endurance, and strengthen the lungs. The latter results from expanding the chest, thus supporting deep breathing. Stretching the arms increases breathing volume. Virabhadrasana I is also said to be an excellent preventative measure against osteoporosis, stimulate the metabolism, help with digestive problems, and reduce fat around the hips. Conclusion Virabhadrasana I has a strengthening, harmonizing, and grounding effect. The key to success is proper posture and breath. The better you connect with the latter, the easier it will be for you to feel the warrior pose and find stability. People with a weak heart, high blood pressure, and unstable knee joints should not perform this yoga exercise. Image © byheaven / 123rf.com
Ardha Baddha Padma Paschimottanasana: Länge im halb gebundenen Lotus erleben

Ardha Baddha Padma Paschimottanasana: Experience length in the half-bound lotus

by Nick on Feb 16 2019
Ardha Baddha Padma Paschimottanasana is a variation of the forward bend that combines an intense stretch with a graceful appearance in a single pose. As with many other yoga poses, the Sanskrit name gives clues to the appearance of this asana: "Ardha" means "half," "Baddha" means "bound," "Padma" means "lotus," and "Paschima" means "back." Ardha Baddha Padma Paschimottanasana also contains the word " Uttanasana ." This asana, which denotes the intense stretch in the forward bend, is usually practiced in beginner yoga classes. Ardha Baddha Padma Paschimottanasana is thus a forward bend with one leg extended and the other in the lotus position. The foot of the stretched leg is grasped by the same-side hand in the forward bend, and the foot of the leg in the half lotus position is grasped by the hand held behind the back. Ardha Baddha Padma Paschimottanasana: Experience length in the half-bound lotus Your path in Ardha Baddha Padma Paschimottanasana Begin in Dandasana , sitting upright with your legs stretched out. From there, place your right leg (you will of course perform the exercise in the opposite direction later) in the lotus position on your left thigh. Make sure that the sole of your foot is pointing upwards as much as possible. This will optimally relieve the strain on your knee in this asana. Now bring your hand around your back and try to grab your right foot with it. No force! Pay attention to the limits that your body tells you to. The correct execution of Ardha Baddha Padma Paschimottanasana is more important than reaching the foot. You can also place your hand on your back. Then, consciously stretch out once more, with your upper body straight, bend over your outstretched leg on the floor and grab the foot. Now try to relax and allow yourself to allow yourself to enter the stretch, which will understandably be very intense at first. Learn about the benefits of Ardha Baddha Padma Paschimottanasana In the half-bound lotus pose, you can stimulate the activity of your liver and spleen, potentially supporting your digestion . The liver is particularly important for fat metabolism, and a well-functioning spleen can purify your blood and effectively strengthen your immune system. You can also potentially benefit from Ardha Baddha Padma Paschimottanasana for gastrointestinal problems, especially constipation. In addition to your internal organs, your musculoskeletal system can also benefit sustainably from Ardha Baddha Padma Paschimottanasana. With your legs resting on the floor, you stretch the backs of your thighs, an area where the muscles often tend to shorten. The same applies to your lower back, which, for healthy posture, shouldn't be shortened either, to avoid a hollow back. The side of the lotus position also benefits from intensive hip opening. By returning your arm behind your back, you gently rotate your upper body and can also stretch shortened chest muscles. This often occurs when we sit at a desk for long periods. Pulling your toes in also makes the involved joints more flexible. What you should pay attention to in Ardha Baddha Padma Paschimottanasana As with all other yoga asanas, the beneficial effects of the half-bound lotus pose depend on performing the exercise correctly. It's especially important to ensure that you enter the forward bend with your back as straight as possible. In the lotus position, turn the soles of your feet upward to relieve pressure on your knees. You can lower your chin slightly in the forward bend to ensure a straight and thus optimally protected cervical spine. If you have problems with your hips or knees, your yoga teacher can show you how to modify Ardha Baddha Padma Paschimottanasana for yourself or teach you an alternative pose. Image © dimol / 123rf.com
Skandanasa: Stärke in der Haltung des Kriegsgottes erleben

Skandanasa: Experience strength in the attitude of the war god

by Nick on Feb 12 2019
You may have practiced Skandasana before turning to yoga. It's a side lunge held very low. You grasp the ankle of each foot with your hands. You also rotate your torso toward the extended leg and lower your upper body onto it. There are also alternatives that make the pose easier or a bit more intense. You'll learn more about these below. The important thing to remember is that all variations have one thing in common: They offer you tremendous hip opening as well as the strength and flexibility of the War God. Skandanasa: Experience strength in the attitude of the war god How to get into the asana of the war god Skandasana Of course, your path to Skandasana can be completely individual. But if you need some inspiration, this sequence might help: Start in a wide forward bend (Prasarita Padottanasana) . From there, bend your right knee (you can do the asana in reverse later, of course) and move into a deep knee bend, the so-called half squat. While your right leg is sharply bent, your left leg remains straight. From there, lift the toes off the floor and pull them toward your body so that only your heel remains in contact with the mat. This is where the options offered by the War God pose begin. For example, flexing your feet is not absolutely necessary. If the stretch with one foot on the floor already seems very intense, or you need a stable grounding with that foot, you can stay with your whole foot on your mat. You can also choose the position of your arms. You don't necessarily have to place your hands on your ankles. For more balance, you can of course also place them on the floor for more stability. You can also place your hands in Anjali Mudra , place your elbow on the left side of your left knee and gently twist up in this way. Side positions of your arms are also possible, of course. Learn the effects of the God of War's stance Skandasana is a standing pose and also a hip opener. This already demonstrates the two main benefits that the War God asana can offer: leg strength and hip flexibility. Depending on which leg you are currently bent in the deep side lunge, you stretch the back and inner thighs, as well as your hips. Your balance is also challenged in the deep War God pose. This also leads to comprehensive strengthening of your core (the abdominal and back muscles). Tips for correct exercise execution If you have trouble balancing in Skandasana, it's helpful to stand on the ball of the foot of the bent leg. This way, you don't need to bend the leg as much. If you're already an advanced yogi, you might be interested in the following variations: For example, you can alternate between Tree Pose and Skandasana, thereby intensifying the strengthening of your legs. You can also tie both hands by bringing your right hand behind your back and joining it with your left hand. No matter how you practice Warrior Pose, it's always important to practice in opposite directions. You should also consult your orthopedist or yoga instructor if you have problems with your hips or knees. There will always be helpful alternatives in yoga. Even as an experienced yogi, always pay attention to correct exercise form. As a beginner, it's best to learn Skandasana in a beginner's class. Afterward, the exercise is also suitable for home practice, allowing you to experience the beneficial experiences that the god of war has to offer in your daily yoga practice. Image © fizkes / 123rf.com
Supta Padangusthasana: intensive Beindehnung im Liegen

Supta Padangusthasana: intensive leg stretch while lying down

by Nick on Feb 01 2019
Do you sit at a computer or study at a desk all day? Then Supta Padangushthasana is the right exercise for you to relieve your strained back! Supta Padangusthasana, the reclining hand-foot pose, offers you both stretching and relaxation. Here you'll learn more about the beneficial effects of this asana, how best to perform it, and various variations. Supta Padangusthasana: intensive leg stretch while lying down Regeneration in supine position: Supta Padangusthasana The Sanskrit name of this asana also reflects the posture: "Supta" means "supine position," "Pada" means "foot," and "Angustha" means "toe." In Supta Padangusthasana, you lie on your back. Begin with your legs bent and both feet on your mat. Pull your bent right knee toward your chest (later, you will also perform this asana in reverse) and hold it there for a few breaths. Then straighten it and let the other leg slide to the floor. This leg is now stretched out on the mat; grasp the other leg with your hand near the foot, stretching the leg, foot, and toe. You can grasp either the foot or the toes, as you prefer. For an intense stretch, it is important that the toes of both legs are flexed. This means the toes are drawn toward your body. Now relax and allow yourself to enjoy the beneficial stretch. Experience the effects of Supta Padangusthasana The reclining hand-and-foot pose can offer you numerous beneficial effects if you perform this asana mindfully and respect your body's limits, which you should do with all yoga asanas. First, you'll feel an effective stretch in the backs of your thighs. You can vary this: The flexed position of your feet further intensifies the stretch of the muscles, which are often shortened in this part of the body. The gluteal muscles are also harmoniously incorporated into the stretch in Supta Padangusthasana. It's important that you perform this asana so that your lumbar spine is on the floor and that you don't arch your back. Then you'll quickly notice that Supta Padangusthasana can help you relax your lower back. This is particularly beneficial after a stressful day at work, and you could incorporate it into your daily evening yoga routine. The hand-foot pose may be a helpful exercise for you if you have problems with the sciatic nerve , which runs from your lower back across your buttocks into your right or left leg (you can also recognize sciatic pain by its path). To be on the safe side, however, you should inform your doctor, such as an orthopedic surgeon, about your yoga practice beforehand. Information about your sciatica problems is also important for your yoga teacher, as they can then pay particular attention to ensuring that you're performing Supta Padangusthasana correctly. Supta Padangusthasana has even more to offer: By consistently engaging your core in this asana, you also strengthen the small muscles around your lumbar spine, which can provide valuable stabilization in this often very vulnerable area of the back. By engaging, you also stimulate the organs located in this area. This is especially interesting for female yogis, as the pose can potentially help you cope with period pain. What you should pay attention to in Supta Padangusthasana In the hand-foot pose, the lumbar spine remains on the floor. This is the most important thing to remember. Even when stretching, be mindful of the limits your body imposes. You don't have to grab the foot of your leg when it's off the floor if that's impossible with the leg straight. Feel free to grab your leg by the calf or thigh. We know numerous props from Iyengar yoga . In Supta Padangusthasana, you can place a strap around your foot and experience an intense stretch tailored to your individual needs, while keeping your back properly grounded to the mat. Image © sandsua / 123rf.com
Parivritta Paschimottanasana - die Vorwärtsbeuge

Parivritta Paschimottanasana - the forward bend

by Nick on Jan 20 2019
Parivritta Paschimottanasana - the forward bend Parivritta Paschimottanasana is composed of the Sanskrit words "paritvritta," "paschima," "uttana," and "asana," which translates as "intense stretching of the back of the body." This asana was first described by Swami Swatmarama in the 14th century and remains one of the fundamental asanas in Hatha Yoga to this day. How to perform Parivritta Paschimottanasana Sit on your yoga mat with your legs stretched out and try to point your toes towards you. Place your palms firmly on the mat next to your hips, fingers pointing towards your feet. Extend your arms straight, keeping your back straight. Wait for your next inhale and then extend your arms vertically out to the side. As you exhale, bend your back forward. Maintain a straight posture and bend from the pelvis. Stretch your hands forward. To do this, reach over your toes from above; alternatively, you can place your big toe between the first three fingers of your hand. If you are new to yoga, for Parivritta Paschimottanasana, simply place your hands on your shins. Don't stress about reaching as far forward as possible. Simply place them wherever your hands land. Just make sure your back is as straight as possible. On your next inhalation, stretch forward again; on your exhalation, draw your upper body further forward. Open your arms so that your elbows point out to the sides. You can increase the stretch in Parivritta Paschimottanasana by resting your forehead as completely as possible on your knees and clasping your feet with your hands. If your thigh muscles are tense, draw your torso forward. The backs of your legs and the backs of your knees should rest firmly on the yoga mat, and your shoulder muscles and neck should be relaxed. As you inhale, lift your head off your knees; as you exhale, relax the muscles again. To come out of Parivritta Paschimottanasana, stretch your arms and spine as you inhale, then slowly release, vertebra by vertebra. The physical effects of Parivritta Paschimottanasana If you're new to yoga, you can place a pillow or a folded blanket under your buttocks to keep your back straight and stable. You may find it helpful to support the stretch in Parivritta Paschimottanasana with a strap placed around your feet. This asana activates your abdominal area and has a strong stimulating effect on your internal organs. Parivritta Paschimottanasana can help improve your digestion. It has also been repeatedly reported to stimulate and strengthen the kidneys and the immune system as a whole. The intense stretch and the back extensors mobilize the entire spine. Hamstrings, as well as the calf and gluteal muscles, can also become more flexible if the asana is practiced regularly. In addition to activating the central median, the pelvic area is well supplied with blood when performed correctly. Ancient texts state that Parivritta Paschimottanasana can not only increase general vitality, but especially blood flow to the genitals. Energetic and mental effects of Parivritta Paschimottanasana If Parivritta Paschimottanasana is held for a long time, this asana unfolds its full energetic potential. It can open Sushumna or Paschimottha Nadi, the so-called subtle spine. Especially in the forward bend, all the chakras are activated, but especially Manipura, the solar plexus or solar plexus chakra . This chakra is one of the main energy centers in the body. Opening through Parivritta Paschimottanasana is said to dispel fear and insecurity. The solar plexus chakra is generally associated with self-confidence, self-awareness, and the meaning of life. In advanced yogis, Parivritta Paschimottanasana can activate the Kundalini. On a mental level, the flow of thoughts is calmed by the asana. Patience, perseverance, and the ability to let go are qualities that are also strengthened. Furthermore, the development of devotion, humility, and forgiveness is encouraged. Image © ddkolos / 123rf.com
Astavakrasana: mit den acht Winkeln schweben

Astavakrasana: floating with the eight angles

by Nick on Jan 15 2019
Astavakrasana: floating with the eight angles If you browse yoga magazines or read online yoga articles, this is a pose you'll often spot in the accompanying images: Astavakrasana seems to completely defy the laws of gravity and therefore exerts something utterly fascinating on us. The practitioner stands on their two hands, which are firmly grounded in the floor. Both legs float stretched out to the side, parallel to the floor, one above and the other below the same shoulder. How does that work? This question inevitably arises when the viewer gazes at the pose, incredulous and amazed. Here you'll learn how to learn Astavakrasana and what effects this beautifully aesthetic asana has to offer. From Ashtanga As you can easily see, Astavakrasana is one of the arm balances. The Sanskrit name, as is often the case, illustrates what a yoga pose is all about. "Asta" means "eight," and "vakra" means "angle" or "bend." The exercise is a pose for advanced practitioners and is classified as Ashtanga Yoga . Holistic exercise If you want to practice Astavakrasana, the most important thing is to block out thoughts of physical and mental weaknesses. Doubts about the strength of your arms, your ability to maintain balance, or simply the thought "that's impossible" are misplaced. For this exercise, as in life, you need confidence. If we believe in our abilities and have self-confidence, we can achieve a lot in our daily lives and at work. This is precisely the message this asana is intended to convey to you. So get to work! Your path to Astavakrasana You begin in Stick Pose (Dandasana) , which is an upright seated position with your legs stretched out. Pull your right knee close to your chest. Press both palms firmly into the floor, with your right shoulder placed in front of your right leg. Your thigh rests against the back of your upper arm. Pull your shoulder blades together and tighten your core. Using the strength in your hands, push yourself off the floor and lift your hips and legs. Move your left leg to the right so that it hovers over your right leg. Now bend forward to create a 90-degree angle in your elbows. Both legs are strong and press against your arm from above and below, respectively. Hold the pose and then repeat on the other side. The effects of Astavakrasana The main message of the exercise has already been mentioned: Have the courage to make the seemingly impossible possible, and trust yourself! Mentally, the eight-angle asana can help you reduce anxiety and stress, as well as strengthen your concentration and both your inner and outer balance. Physically, you primarily train the strength in your wrists and shoulders. You also tone the abdominal muscles. This exercise can help alleviate discomfort during menstruation or during menopause . Furthermore, you maintain a harmonious connection between mind and body, supported by your conscious breathing. This exercise allows you to grow a little bit at a time. Preparing for your path to Astavakrasana Good preparatory exercises for the eight-angle arm balance in yoga are the forward bend in Uttanasana , the hip opening of Baddha Konasana , or the strength you experience in Chaturanga . You can also practice balance well in the Crow Pose Bakasana. You can also support yourself with bolsters under your hips and outer leg during your first attempts at Astavakrasana. Your yoga teachers know other ways to support yourself, so the path to this asana may be quicker than you think. Note: If you have shoulder or wrist problems, you should incorporate alternative asanas into your yoga practice! Image © milkos / 123rf.com
Bakasana: schweben wie die Krähe

Bakasana: hover like a crow

by Nick on Jan 12 2019
Bakasana: hover like a crow This exercise is fun, looks great, and develops a whole range of skills. Bakasana, the crow pose, is easy to recognize: The practitioner stands with only their hands firmly planted on their mat, and their bent legs float in the air with the rest of their body. Although the exercise doesn't look particularly easy at first glance, it can often be learned quickly even by yoga beginners. All you need is a little strength in your hands and a dose of courage. You'll be able to take off and enjoy your little flight over your mat. Just give it a try. Here you'll learn how to do Bakasana successfully and what positive effects the crow pose can offer you. Take off and feel good! Good grounding is important. Therefore, squat down and pay close attention to how you place your hands. If you place your fingers well spread on your mat, you'll have a larger surface area, significantly improving your balance. Your arms should be slightly bent at the elbows so you can flexibly find your balance. Decide whether you want to place your knees above your armpits or on the outside of your arms. In every variation, it's important that your legs are firmly planted. Now comes your second decision regarding this asana. Would you prefer to lift both legs off the ground at the same time, or would you prefer to enter Bakasana by lifting one foot off the floor at a time? Both variations are correct. The further you lean your upper body forward, the easier it will probably be for you to maintain your balance . The fear of losing your balance is normal. The more you practice the exercise, the more it will disappear. It's best to focus on one point on the mat. This provides you with calm and concentration. Feel the positive effects Bakasana has tremendous benefits for the mind, body, and spirit. This begins with the strength that develops in your fingers and hands, but also in your arms. By engaging your core, you strengthen your abdominal muscles and activate your digestive organs. Your inner leg muscles also participate in this exercise and play a crucial role in its success. Your back experiences a soothing stretch. Crow pose is also a gentle hip opener. Mentally and emotionally, your self-confidence will be strengthened, and you'll achieve balance both visually and internally. The message of Bakasana is that with a little courage and your two hands, you can accomplish a lot: even fly. Try it out and see how good it feels and how much better Bakasana will work each time! Prepare Bakasana well For Crow Pose, you need strength in your hands, good hip opening, and balance. You can achieve this strength in the plank pose Chaturanga, for example, or simply in Downward-Facing Dog. Hip opening can be achieved in Lotus Position or Triangle Trikonasana , for example. You can train balance in Tree Poses. If you have trouble getting into Bakasana, you can place your feet on a yoga block and move into Crow Pose from there. If balance is a concern, place a person in front of you to catch you or place soft padding in front of you. But you'll soon realize that you don't need any of this. Important information for you Your yoga teacher can always give you the support you need. One more thing is important to know before you take off into your first Crow Pose: Consciously pull your shoulders away from your ears to keep your neck long and avoid tension. If you have shoulder or finger problems, there are valuable alternatives to Bakasana. You should also avoid taking off into Crow Pose during pregnancy. Image © djoronimo / 123rf.com
Chatus Pada Pitham - körperliche und geistige Flexibilität

Chatus Pada Pitham - physical and mental flexibility

by Nick on Jan 08 2019
Chatus Pada Pitham - physical and mental flexibility Translated, the Sanskrit term Chatus Pada Pitham means four-legged or four-footed table, although Pitham can also be translated as stool or bench. In this asana, your hands and feet remain firmly planted on the floor, while your pelvis, back, and shoulders are in a straight line off the floor. Thus, as the translation suggests, the shape of the posture is reminiscent of a stool or table. In a figurative sense, the stable support of the table legs—that is, your arms and legs—ensures your balance. On this solid foundation, your torso and back flexibly escape the pull of gravity and experience the resulting freedom. They open themselves to higher realms. Backbends change the perspective Chatus Pada Pitham is one of the backbends. These are inverted poses, as you move from an earth-facing posture by bending your torso and back upward and backward. Your face, and consequently your attention, also takes on a different perspective. The belly, chest, heart, and throat open up and achieve a sense of spaciousness—this is one of the goals of Chatus Pada Pitham. At the same time, you should strengthen your earthbound steadfastness and experience the freedom that results from it. Take Chatus Pada Pitham This asana is suitable for beginners and advanced practitioners. Initially, the unfamiliar posture and muscle strain may limit execution. However, this will improve: Gradually, you'll be able to better achieve the desired position and hold it for longer. First, sit upright with your legs bent and support yourself with your hands behind you. Place your palms behind your buttocks, with your fingers facing away from your body, also pointing backward. As you inhale, slowly raise your pelvis, while simultaneously pressing firmly onto the floor with your hands and feet, tensing your vascular muscles to generate the strength to lift the pelvis. Ultimately, your thighs, buttocks, and back should form a horizontal line up to your shoulders. Another vertical line is formed by the lower legs from the heels to the knees, and a final one by the arms from the wrists to the shoulders. Your hands and feet should be approximately the same width apart as your buttocks. Your head should be tilted back in a relaxed position. Your eyes should also look back—ideally, you see everything from a reverse perspective. If this isn't possible, for example, due to tense or sore neck muscles , tilt your head slightly toward your chest. Hold the asana and relax your back To hold Chatus Pada Pitham, tighten your thigh, glute, and abdominal muscles. Hold the pose for a few breaths. As you breathe deeply, try to feel the strength in your legs and the lightness of your spine. With practice, yogis report increased elasticity and strengthening of the core muscles. With some practice, you'll be able to completely relax your back. Looking backwards allows you to gain a different perspective while maintaining secure contact with the floor with your hands and feet. You end Chatus Pada Pitham by slowly lowering the pelvis as you exhale, one vertebra at a time, until you have returned to the starting position. Physical, mental and spiritual effects Yoga aims to affect the body, mind, and spirit. In Chatus Pada Pitham, the four-legged table pose, you stretch the back of your body. This pose is intended to refine your sense of balance and sharpen your senses for increased body awareness. The arms and legs lend stability to the asana and are strengthened, while the back gains greater flexibility. The inversion pose is also intended to help you leave old habits behind, gain a new perspective, and experience spiritual freedom. Mentally, the goal is inner balance, a relaxed posture, serenity, flexibility, and willpower. Image © yuryrumovsky / 123rf.com
Adho Mukha Vrksasana - der Handstand

Adho Mukha Vrksasana - the handstand

by Nick on Jan 05 2019
Adho Mukha Vrksasana - the handstand The Adho Mukha Vrksasana pose is one of the asanas that demands a very special level of concentration and physical balance. The handstand, when performed correctly, is no different from the classic handstand in gymnastics, yet the handstand in yoga is a more conscious exercise. After all, this pose isn't just about shoulder strength and physical balance, but also about overcoming mental barriers . Closely connected to the handstand is the – only human – fear of falling. Learn how to gradually work your way up to Adho Mukha Vrksasana and why you absolutely should. The slow and safe way to the handstand First, make sure you're warmed up properly. Don't start a session with Adho Mukha Vrksasana; loosen your shoulders beforehand and use your workout routine to gently loosen up. To assume Adho Mukha Vrksasana, start in downward-facing dog (Adho Mukha Svanasana) and place your fingers just a few inches from the wall. Place your hands under your shoulders, fingers pointing forward, parallel to each other. Rotate your upper arms slightly outward to open your shoulder blades. Press your hands firmly into the floor. Now pull one of your legs a step closer to you so that it is slightly bent. Do a few practice hops to get a feel for the necessary momentum. The goal is to keep your upper body straight, with your center of gravity (your hips) positioned vertically above your hands. This will make your legs almost weightless, allowing you to reach the Adho Mukha Vrksasana position with your long, stretched leg in a wide arc, then bring the bent leg up and stop. First, practice the handstand against a wall to ensure you remain secure. If you use too much momentum, the wall will stop you; if you use too little momentum, you'll land back on your feet. This feel for the necessary balance is important for eventually being able to perform Adho Mukha Vrksasana while standing freely. With each successful handstand, the next one will be a little easier. The goal should be to achieve a straight handstand with your body completely stretched. Only your head is back, looking down at your hands. Try to hold Adho Mukha Vrksasana for 10-15 seconds and then gently land your feet again, slowly shifting your center of gravity. This will allow you to land softly, like a cat on your toes. If you perform Adho Mukha Vrksasana standing freely and find yourself wobbling, try to bend your legs towards your navel. This will help you land back on your feet. If you fall towards your back, quickly tuck your chin to your chest; this will cause your back to naturally round. Bend your arms to reduce the height of your fall and let yourself roll over. Remember these safety tips, and then you don't have to be afraid of falling. Especially at the beginning, occasional falls are part of the handstand routine. Powerful pressure and energy flow As with all downward-facing asanas, Adho Mukha Vrksasana benefits from the reversed blood flow, allowing the blood to slowly sink from your feet to your head. Unlike other vertically inverted poses, however, you must maintain the handstand with great strength and discipline, which naturally shortens the duration of the position. Physically, Adho Mukha Vrksasana is one of the most demanding asanas; the handstand challenges and develops your sense of balance, core strength, and, of course, your upper arms (especially your triceps), shoulders, and shoulder blades. You'll notice the effort as soon as you assume the pose. In the handstand, you'll not only confront your fear of falling, but also be expected to find inner balance. The demanding nature of the exercise forces you to focus exclusively on your body and let go of everyday annoyances. At the same time, you'll develop your balance, body awareness, and self-awareness —which can also help you off the yoga mat. Image © lightfieldstudios / 123rf.com
Apanasana - Apana-Haltung

Apanasana - Apana Pose

by Nick on Jan 01 2019
Apanasana - Apana Pose Apanasana provides comfort and cares for the digestive organs. Specifically, Apanasana refers to one of the vital airs located in the abdomen and governing the functions of the digestive tract. Furthermore, it supports letting go on both a physical and psychological level. Effects of Apanasana Apanasana benefits the outward, predominantly downward flowing aspect of life energy, known as Apana Vaya. Apanasana supports the sexual, digestive, and detoxifying organs. The pose is also called the "energy-relieving pose," "asana that releases wind," or "packet pose." Apanasana is one of the most effective asanas if you suffer from constipation or flatulence. The pose benefits both body and mind in several ways. It relaxes and stretches the entire spine, especially the lower back. The back muscles, especially the backs of the thighs, the gluteal muscles, and the erector spinae, are stretched. Consequently, the pose can also provide relief from sciatica or back tension. Furthermore, it offers a good balancing position after backbends. On a psychological level, this yoga pose counteracts tension and stress. The pose is also a true treat for in-between activities, especially after prolonged sitting or standing. Effects of Apanasana at a glance: Has an extremely positive effect on the solar plexus Deepens breathing Supports sexual and digestive organs Shoulder tension and neck pain can be eliminated Can help with constipation and flatulence Relieves the lower back Can have a relaxing effect on menstrual cramps Relaxation of the small pelvis (bladder and uterus) Alignment of Apanasana The exercise takes about 5-10 minutes and is performed as follows: First, lie down on the floor with a blanket or mat. While lying on your back, your spine, neck, and head should be straight. If this is uncomfortable, you can also rest your head on a folded, soft blanket. Now stretch out and feel the contact with the floor. As you exhale, pull your right knee toward your right chest. Hug your knee for a moment and then lower it as you inhale. You can now switch sides, if you like, and do this more often. During the exercise, pay attention to the natural curves of the spine and ensure that the shoulders and pelvis remain on the floor. As you exhale, pull both knees toward your chest: Hold your left knee with your right hand and your right knee with your right hand. As you inhale, push your knees away from you until your arms are straight, then pull them toward you as you exhale. Hug your knees and remain in Apanasana for six deep abdominal breaths before lowering your legs again. Repeat the exercise 5-10 times at your own breathing rhythm. Apanasana is an excellent counterbalance after the shoulder bridge . Cultivate an inner smile during the exercise – this will help you perform the exercise with a certain centeredness and ease. Variations of Apanasana You can add some variety with a few variations. The following extensions or modifications are possible: Make several large circles with your knees, first apart and then towards each other. As you exhale, lift your head and bring your forehead toward your knees. Slowly lower it again as you inhale. Roll slightly from side to side to massage your lower back. A very relaxing variation involves resting your buttocks against a wall while resting your feet against the wall. An extension is the Ardha Apanasana with Kapalabhati. When should Apanasana be avoided If you suffer from a herniated disc or unexplained back pain in the lumbar spine, it is advisable to only perform this exercise with a trained therapist or instructor. It should not be practiced if you have acute inflammation in the knee or hip joints, or in the abdominal organs. And now, have fun practicing. Om Shanti! Image © xalanx / 123rf.com
Niralamba Sarvangasana - der ungestützte Schulterstand

Niralamba Sarvangasana - the unsupported shoulder stand

by Nick on Dec 29 2018
Niralamba Sarvangasana - the unsupported shoulder stand Niralamba Sarvangasana, or unsupported shoulder stand, is an asana that can be challenging even for more experienced yogis. The pose, in which the feet are stretched toward the sky and the head rests on the mat, demands not only considerable physical discipline but also flexibility, mobility, strength, and a certain amount of determination. This makes this shoulder stand the ideal exercise for advanced practitioners and the logical continuation of the supported shoulder stand. Learn how to achieve a proper execution of Niralamba Sarvangasana and how the pose affects your body and mind here. Feet to the sky, neck tense - the execution of Niralamba Sarvangasana To be able to perform the unsupported shoulder stand correctly, you should first master the supported shoulder stand (Salamba Sarvangasana) with ease. This asana essentially uses the same muscles as the unsupported shoulder stand, but by placing your hands on your hips, you have more control over your torso and can adjust the load more carefully. Also, make sure you use not only a regular yoga mat to prevent slipping, but also a soft mat for your neck . If you don't have a soft mat, you can also use a few towels or a triple-folded yoga mat – just be careful not to press your neck vertebrae too hard into the floor. Now position yourself so that your shoulders and neck are resting on the thick mat, but not your head. Now roll your hips, raise your upper body, and come into the plow pose, placing your feet behind your head. Support yourself with your hands on your hips and keep your upper body upright. From the plow pose, try to lift your straight legs and stretch them upwards. This requires a lot of back strength and core tension. If you can't do this right away, pull your legs toward you, keeping them bent, and from a squat position, stretch them toward the ceiling to practice the shoulderstand pose. In shoulder stand, make sure that your body is as upright as possible and that there is no bend in the hips. Have a partner or teacher guide you, especially at the beginning. You will now be in Salamba Sarvangasana. From this position, place your arms stretched out behind your head. Place the backs of your hands relaxed on the floor and let your palms face upwards. Hold this position for about 20 to 30 seconds, breathing calmly and with control. In a variation of the exercise, rest on your shoulders and neck and stretch your hands along your sides towards the ceiling. Exit the pose by slowly and controlled rolling your body over your shoulder blades and back. Let your back travel vertebra by vertebra along the mat, using your arms and legs as counterweights. Niralamba Sarvangasana - a difficult position with many positive effects Niralamba Sarvangasana is a challenging asana that, while being considered a classic yoga pose, gently expands the body's limits. It primarily trains strength in the lower back and core, but also in the legs and arms. The neck and shoulders are stretched in this pose. In conjunction with strengthening the lower back, Niralamba Sarvangasana is recommended for counteracting pain from prolonged sitting and desk work. It also stimulates circulation, as blood flow is now upside down. This can have a positive effect on fatigue and alleviate symptoms of stress. In Niralamba Sarvangasana, you're meant to find your mental balance along with physical balance. Since your arms aren't available in the unsupported shoulder stand, your back has to do much more work. This form of shoulder stand effortlessly bridges the gap between balance and strengthening. Image © ivanvess / 123rf.com
Das Upavesasana - Die Hocke als Alltagshaltung und Beginner-Pose

Upavesasana - The squat as an everyday posture and beginner's pose

by Nick on Dec 25 2018
Upavesasana - The squat as an everyday posture and beginner's pose Upavesasana is a pose that even beginners can perform and is best translated simply as squatting. Of course, it can be translated more floridly, as the pose is also known as Malasana. Here, mala is usually translated as garland or prayer beads, which is what we are dealing with in Garland Pose. When performing and looking at Upavesasana or the squatting position, there's nothing garland-like at all. Pose of simple life Rather, much more primal associations are evoked, which is also indicated by an alternative translation of mala. Here it takes on the meaning of feces or leftovers. In fact, Upavesasana or Malasana assumes the posture that was common in our country when using the toilet before the introduction of the toilet seat. This is still the case in India and many other parts of the world. Upavesasana is also the pose that is assumed there when working in the fields, tending the garden, and often when playing, chatting on the street, or cooking. In the West, however, sitting on a chair has taken on the role of an everyday posture. This is the reason why Malasana, although a pose for beginners, initially causes many people difficulty and pain. But don't worry: with a little practice, Upavesasana will become mastered very quickly and without any effort. Prerequisite for Malasana The mala motif, here representing purity from waste products, also plays a role in preparing for Upavesasana. You should abstain from food for at least six hours beforehand so that your stomach and intestines aren't burdened by digestive activity. Malasana is therefore best performed in the morning—or in the evening after a day of fasting . The basics of Upavesasana First, squat down. Make sure your feet are parallel to each other and that their entire surface, including your heels, is touching the floor. Hold your upper body at a 90-degree angle with your stomach drawn in and shoulders pulled up. Stay in this position for a few breaths. Now open your thighs so that there is space between them. As you exhale, bend forward and bring your upper body into the space created. Now bring your hands together in front of your heart ( Anjali Mudra ) and press your elbows against the inside of your thighs, while these exert counter pressure. You assume a stable position and stay in this position for a while. Then stretch out your arms, bring them behind your thighs and grasp your ankles above the heel. After another 15 to 20 seconds of pausing, the Upavesasana exercise is complete. Help to squat If you have trouble squatting at first, you can use a large brick or yoga block placed upright as a seat support. Once you can easily maintain the squat with this support, place the brick across the floor. If you can still squat, it's time to remove the support. Effect of Upavesasana With Malasana, you can strengthen your hips, thighs, knees, calves, and ankles. In addition to strengthening your muscles, you can also improve circulation in your legs. The exercise can also promote mobility in the shoulder and chest areas. Strengthening your abdominal muscles, among other things, can also be linked to improved digestion. For women, Upavesasana may also be able to relieve menstrual back pain. In these cases you should avoid Malasana However, you should not practice Malasana if you are suffering from a knee or ankle injury. Upavesasana should also be avoided if you have acute or chronic back pain. Incidentally, you should also avoid Malasana if your body is under a lot of strain, for example, after exercise. The risk of knee and ankle injuries is too high. Upavesasana is also not suitable during pregnancy . Image © dolgachov / 123rf.com
Salamba Sarvangasana: die Welt aus anderer Sicht betrachten

Salamba Sarvangasana: Seeing the world from a different perspective

by Nick on Dec 22 2018
Salamba Sarvangasana: Seeing the world from a different perspective The "mother of all asanas" is a name that raises high expectations. But if you've ever practiced Salamba Sarvangasana, you may have already felt some of its beneficial effects right away. It's no coincidence that the pose is also well-known in the Western world, and is often practiced by children in kindergarten as a candle pose. Here you'll learn what physical, mental, and spiritual benefits you can get from simply turning the world upside down and looking at it from below. Experience holistic effects The name alone tells you that supported shoulder stand is one of the most important disciplines and is one of the 84 core asanas of classical Hatha Yoga. "Sarva" means "all," "anga" means "part," and "asana" as a term for "exercise" is certainly familiar. Salamba Sarvangasana, or "Candle," is a pose that can have a positive effect on your entire body and mind. Read here how you can benefit from this inversion. Salamba Sarvangasana stimulates your body's metabolic processes and can particularly support thyroid function. Regarding the skeletal structure, the spine, in particular, remains flexible. Your internal organs, especially your digestive and sexual organs, are gently activated. The more you can immerse yourself in Shoulderstand, the more calming it will likely have on you. This complements the gentle stretching of the neck muscles , which are often strained in everyday work. If you're on your feet all day, you'll also feel the beneficial relief for your blood vessels. Listen to your body as you go. The candle is one of the classic rejuvenation exercises in yoga. As an inversion, it regulates your prana and can support a youthful appearance. Seeing the world from below can sometimes also break through entrenched ways of thinking and open up new paths. Try it! How to get into shoulder stand Never practiced Salamba Sarvangasana? Give it a try, ideally in a yoga class first, so your yoga instructor can correct your posture or offer assistance. Begin by lying on your back on your mat, grounding yourself. Then slowly raise your legs, hips, and torso to a vertical position. Support yourself in two ways: first, by grounding your elbows to the floor, and second, by supporting your back with your hands. Gently tuck your chin toward your chest. This stimulates your thyroid and lengthens your neck. You exit this pose with the same control you used when you entered Salamba Sarvangasana. A great countermovement to the candle is Fish Pose (Matsyasana) . Help for your practice If you don't feel confident in Salamba Sarvangasana and need more stability, you can practice Shoulderstand against a wall first. It can also be easier, especially if you lack the strength for the vertical inversion, to first rest your sacrum comfortably on a block and then practice raising your legs to the vertical position. Accurate practice is very important The better you can support yourself with your elbows (they should be as close together as possible) and hands, the better you can relieve pressure on your neck. You should also avoid swinging during shoulderstand. Make sure your hands are placed toward your shoulders for support, rather than pressing on your kidneys or directly onto your spine. If you have a neck injury or are in the second trimester of pregnancy, you should stop practicing the candle pose. However, your yoga teachers will always be able to recommend a valuable alternative to Salamba Sarvangasana that can offer similarly positive effects. Trust their experience! Image © djoronimo / 123rf.com
Mahamudra - das große Siegel

Mahamudra - the great seal

by Nick on Dec 18 2018
Mahamudra - the great seal Mahamudra is an advanced Hatha Yoga practice . Mudra means "seal" in Sanskrit. Mahamudra means "great seal." These are powerful hand gestures that are said to have various health-promoting effects. Furthermore, the finger positions are said to positively influence body energy and mood. Below, you'll learn exactly what Mahamudra is, how it's performed, what benefits it can bring, and what to keep in mind. What is Mahamudra? Maha means great, and mudra means "energy-awakening posture." Mahamudra is used in many Tibetan Buddhist schools. The method serves to truly understand our minds and thus experience inner enlightenment. The main goal is to give meaning to our lives. The advanced yoga practice of Mahamudra trains three major bandhas (body locks): Mula , Uddiyana , and Jalandhara Bandha . Thus, all the benefits of the three different bandhas are combined in this posture. The exercise is performed on the floor and uses the Janu Sirsasana pose . The spine is extended in all directions: forward, upward, sideways, twisted, backward, and inverted. This supports the optimal flow of life energy, also known as prana. Everyone has more or less prana. Generally, people say, "Today I have a lot of energy" or "Today I have no energy." How does Mahamudra work? Stretch your right leg forward and bend your left knee. Place your heel between your genitals and anus. Grab your front foot with your hands and grab your right toes. Keeping your spine as straight as possible, bend forward. Inhale deeply and hold your breath. Rest your chin on your chest. Then exhale. Repeat this. While holding your breath, bring the tip of your tongue back to your throat. With your eyes closed, look to the point between your eyebrows. To come out of the pose, release all locks and rise again while inhaling. Then switch sides: Stretch your left leg forward, bend your right knee, and place your right heel between your genitals and anus again. Continue as you did on the other side. The more you hold your breath, the stronger the energy becomes. What can you achieve through Mahamudra? Mahamudra effectively stimulates the Muladhara Chakra . This is our root, which strengthens us when we lose our footing. It grounds us. When you bend your body forward, the energy in the energy centers is activated. The tongue position directs the energy to the point between your eyebrows. The chin lock ensures that the energy does not flow outwards. Because it calms the mind, it is an optimal practice before meditation. With this posture, you can strengthen the shoulders and lumbar muscles and energize the entire body. Mahamudra is also said to be able to alleviate or cure various health problems, such as coughs, hemorrhoids, an enlarged spleen, digestive problems, gastritis, irritable bowel syndrome, abdominal and pelvic diseases, diabetes, menstrual pain, skin rashes, and fever. To fully experience the positive effects, you should repeat the exercise regularly. Summary Mahamudra is considered one of the best yoga practices in yogic texts because it incorporates all three bandhas. This can positively influence both physical and mental well-being. This advanced practice can have many physical benefits (particularly with regard to various abdominal ailments), balance the mind, and free it from negative thoughts. The body and mind can generally achieve good health. Those suffering from high blood pressure and heart problems should avoid this practice, as it can cause respiratory arrest. Image © yuryrumovsky / 123rf.com