Yoga BLOG

Ardha Baddha Padmottanasana: Vorbeuge und Lotus in Kombination erleben

Ardha Baddha Padmottanasana: Experience forward bend and lotus pose in combination

by Nick on Sep 15 2018
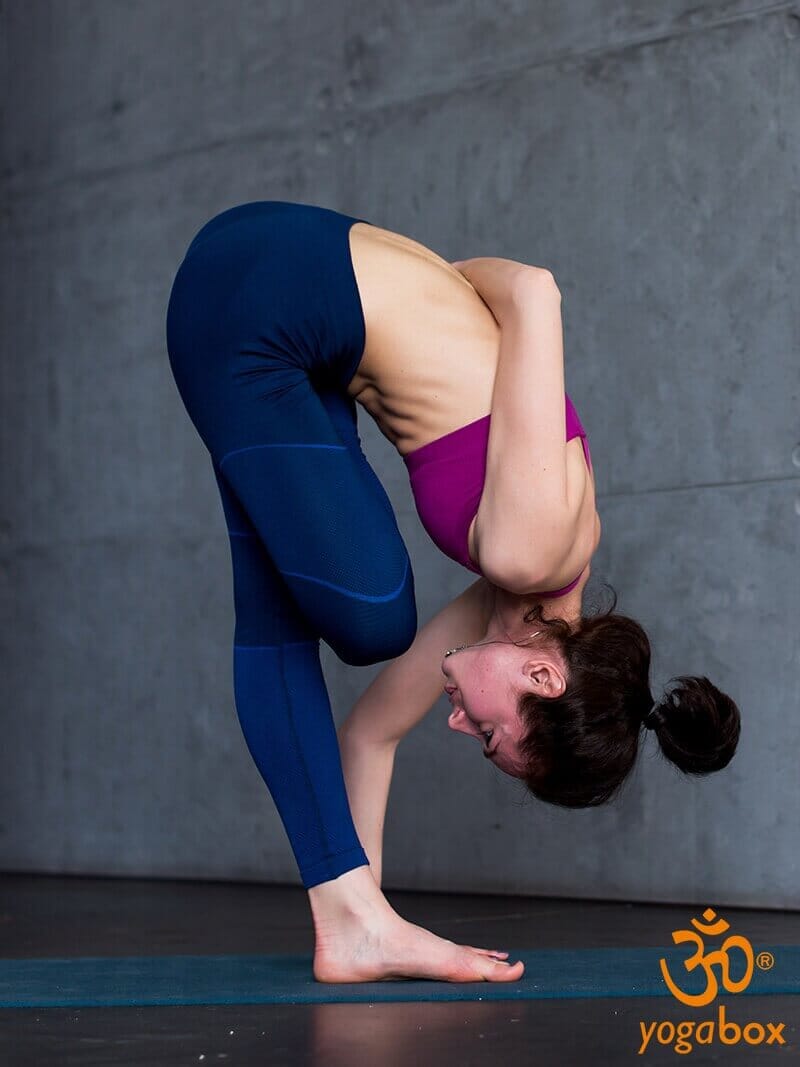
Ardha Baddha Padmottanasana is a pose that combines the beneficial effects of two poses. If you look at the pose, you'll see that the Half Lotus Pose (Ardha Padmottanansana) is connected to the classic standing forward bend (Uttanasana). The Sanskrit translation reveals this connection precisely: "Ardha" means "half," "Baddha" means "bound," "Padma" is the name for the lotus, "Uttana" is the intense stretch, and "asana" is the name for "pose." Here you'll learn how to assume and practice Ardha Baddha Padmottanasana and what effects the pose can have on you.
Parivritta Janu Shirshasana: die umgekehrte Kopf zum Knie-Pose

Parivritta Janu Shirshasana: the reverse head to knee pose

by Nick on Sep 10 2018
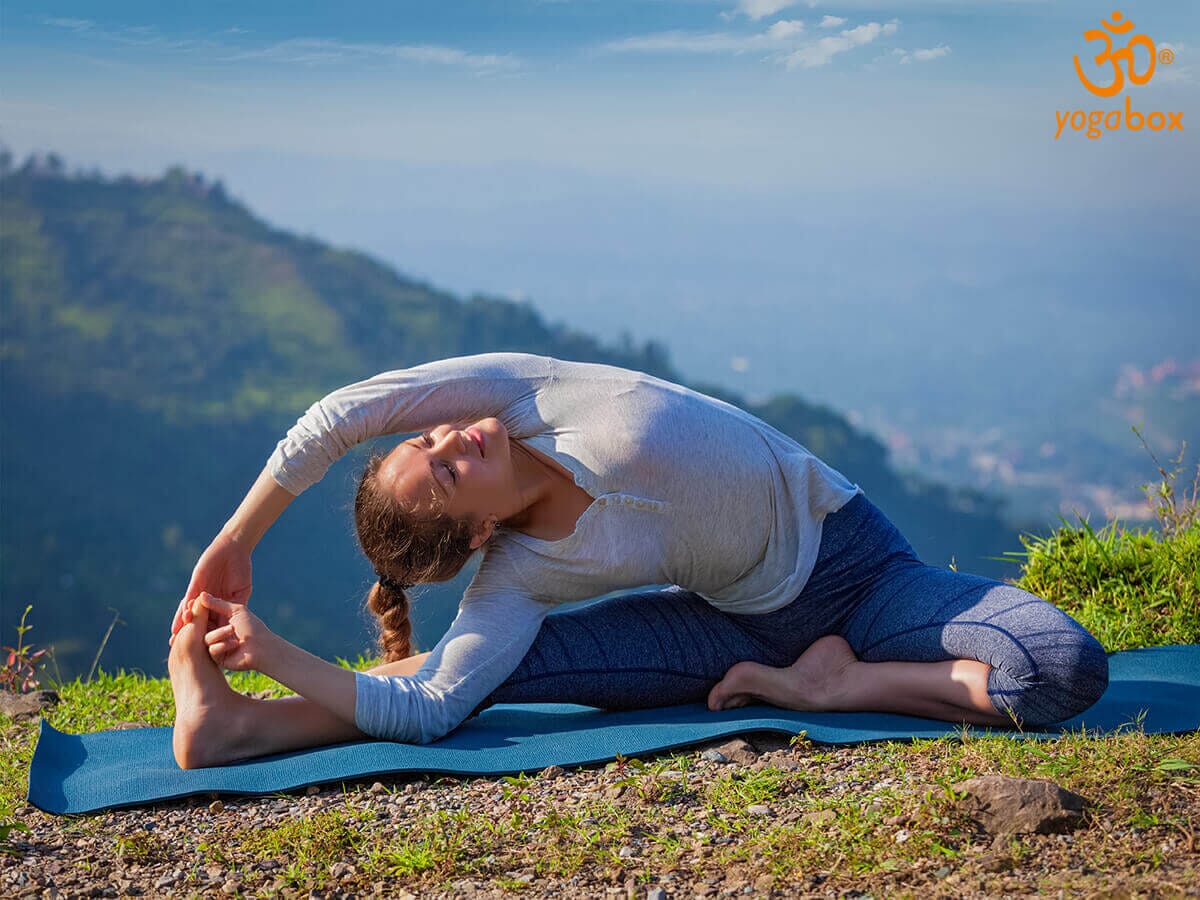
This asana combines the classic forward bend with a soothing side twist. It is associated with physical, mental, and spiritual positive effects and brings you complete harmony. Here you'll learn how to practice Parivritta Janu Shirshasana and how to do it correctly...
Urdhva Prasarita Ekapadasana: die Verbindung von Himmel und Erde

Urdhva Prasarita Ekapadasana: the connection of heaven and earth

by Nick on Sep 07 2018
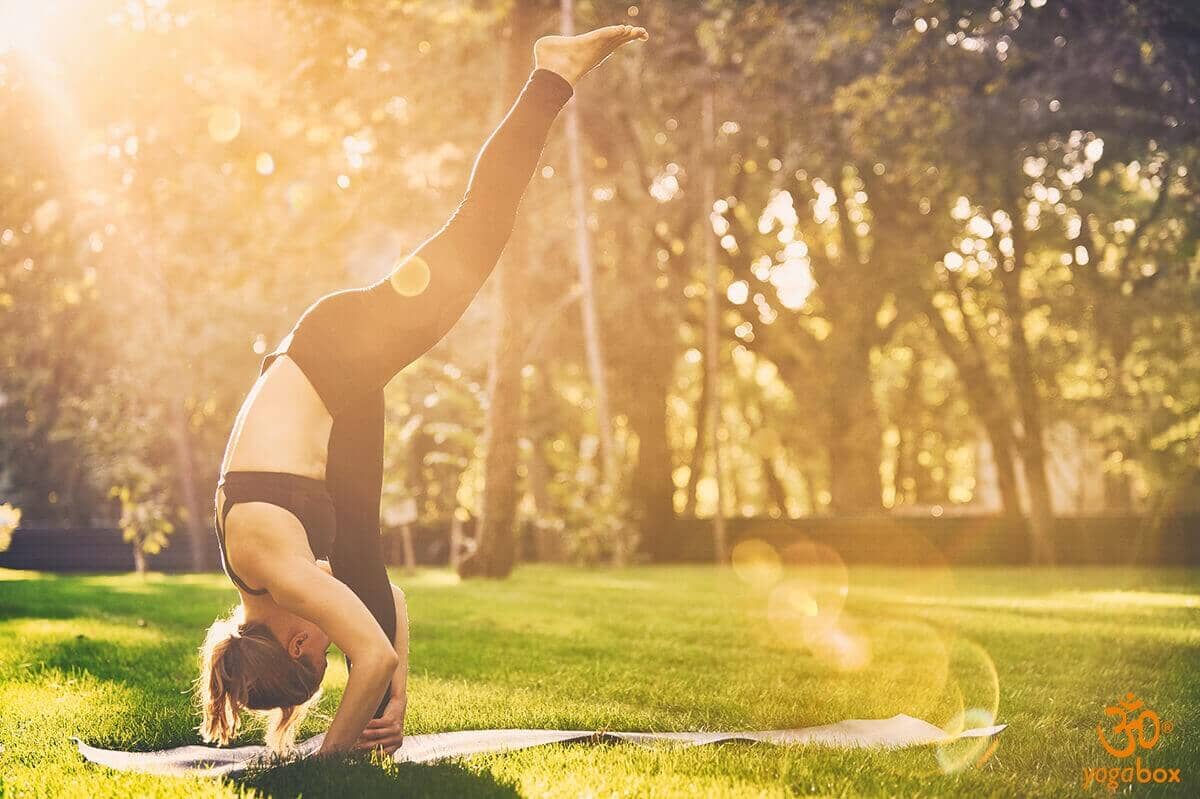
Urdhva Prasarita Ekapadasana, the "standing split in the park," has a graceful name in both Sanskrit and German. Just as graceful as the pose, which you can easily recognize by the forward bend with the leg tucked upwards: It's a standing split that connects earth and sky through the practitioner's body.

Pratyahara: the fifth limb in Raja Yoga

by Nick on Jul 07 2018
Pratyahara: the fifth limb in Raja Yoga Pratyahara: the fifth limb in Raja Yoga For people who are new to yoga, yoga practice primarily consists of physical exercises, the asanas. But yoga is, of course, much more, as anyone who delves deeper into this millennia-old tradition will recognize. The fact that yoga embraces body, mind, and spirit equally is particularly evident in Raja Yoga (Asthanga Yoga). It has eight limbs, which Patanjali describes in his Yoga Sutras. Pratyahara is the fifth limb in the eight-limbed system of yoga. Here you can learn more about its classification, practice, and effects. The eight limbs of Raja Yoga Raja Yoga consists of the following limbs: Yama : dealing with others Niyama: the attitude towards oneself Asana: the physical exercises Pranayama : the breathing exercises Pratyahara: withdrawing the senses Dharana: concentration Dhyana: absorption during meditation Samadhi: the superconsciousness The stages of Pratyahara will not be explained further here. The point is simply to help you understand how Pratyahara fits in and that yoga considers body, mind, and soul as a whole. Pratyahara: the withdrawal of the senses Pratyahara, like many yoga terms, comes from Sanskrit. The word means "retreat from battle." Even though it's not military-related, the image is somewhat appropriate for today's world. We're often overwhelmed by sensory impressions and thoughts. The "war" that rages in our minds causes stress. Therefore, Pratyahara is an essential building block when it comes to our well-being. When nothing is bombarding us anymore, when our "inner troops" have withdrawn, we often feel the peace and relaxation we've long sought. Characteristics of Pratyahara This fifth limb in the eight-limbed path has several characteristics. First, it is the withdrawal from sense objects. In yoga, this refers to everything we can perceive with the senses: everything we can see, hear, taste, smell, or touch. Another characteristic is the withdrawal from our perception. This means that we do not allow any sensory impressions in this state at all. The third characteristic is the withdrawal from attachment. This involves not allowing the mind to become active. Pratyahara in everyday life and meditation In your daily life, you continually incorporate the fifth limb of Raja Yoga. This is, of course, only possible once you have gradually developed an awareness of this state. You can also incorporate it into meditation. Here, you might recall your first yoga classes, where you were supposed to sit in silence and allow any thoughts that arise to pass by without judgment. Preparation is necessary. Pratyahara is the fifth limb of Raja Yoga for a reason. You should only begin these practices once you are somewhat familiar with the previous stages. It is also helpful to have a yoga teacher with solid spiritual practice at your side. Discipline and perseverance are very important in the beginning. The more you try not to focus on something, the more likely you are to do it in the beginning. Withdraw the senses one by one Withdrawing all the senses at once is almost impossible. Therefore, there's a rule of thumb for how to best achieve Pratyahara. This involves the wildest sense. It's the one that's most active in you individually. Concentrate on gradually reining in this sense. Once you succeed, you can add the next sense to your practice. Force is absolutely essential. The important thing is to withdraw the senses gently, so as not to draw the mind's attention to them and refocus. Image © deklofenak / 123rf.com

Yoga exercises for the neck and shoulders

by Nick on Jun 11 2018
Yoga exercises for the neck and shoulders The neck and shoulders are a problem area for many people. This is where persistent tension often resides. This can result in neck pain and headaches, or even pain radiating into the arms and hands. Yoga exercises can help keep the shoulder and neck area supple and relaxed. However, there are a few things to keep in mind. Why is the neck area so often tense? There are several reasons why our muscles, especially in the shoulder and neck area, are often tense. One of them is a lack of exercise. Staring motionlessly at a monitor for hours, for example, causes the muscles to fatigue and cramp. Another reason is that the weight of the arms exerts its influence on the cervical spine (C-spine) via the trapezius muscle. The muscles that stabilize the cervical spine therefore also have to perform considerable supportive work. And thirdly, stress also contributes significantly. The stress response consists not only of the famous "fight or flight" response, but also "fright" as a third option – and a biologically inherited control program then causes us to pull our heads in. We usually don't even notice it. Or only after hours, when the tense muscles begin to hurt. This typical pain in the neck area is caused by reduced blood flow to the muscles. What yoga exercises are there for the neck area? Two yoga poses in particular, the Plough Pose (Halasana) and the Ear-Knee Pose (Karna Pidasana) , are particularly suitable for maintaining healthy and flexible neck postures and keeping the important energy pathways that run there open. Careful instruction from an experienced instructor is essential. Both yoga poses are demanding and require a certain degree of body control and flexibility. Therefore, they should not be attempted on your own by inexperienced individuals—especially if you already have discomfort in the shoulder and neck area. How does Halasana affect the shoulders and neck? Halasana acts as a stretch for the entire spine. The stretching effect is particularly noticeable in the neck area. With repeated practice, the deep muscles of the cervical spine are relaxed and stretched. This makes the cervical spine more flexible and relaxed. It also improves blood circulation to the neck and shoulder muscles. Regulating muscle tension in the cervical spine is important because, in addition to major energy channels, there are also many small nerve nodes (ganglia) of the autonomic nervous system, which can be irritated by persistent tension. This can lead to dizziness, headaches, nausea, or migraines, for example. Optimal muscle tension in the shoulder girdle and neck area can therefore also prevent a whole range of complaints. In addition to this very soothing effect on the shoulders and neck, Halasana also gently stretches the backs of the legs. The strong flexor muscles on the back of the legs, in particular, tend to shorten. Halasana counteracts and reduces muscle shortening on the back of the legs. Furthermore, the abdominal organs also receive a gentle massage that promotes circulation. If you have difficulty performing Halasana, your yoga teacher can show you variations that will help you gently work toward the correct position. How does Karna Pidasana affect the body and consciousness? Many people appreciate this yoga pose because it completely closes the sensory doors (eyes and ears), allowing for a deep sense of inner peace without distractions. The pose also offers a host of benefits for the neck and shoulder area: the stretching of the neck, spine, and leg muscles described above occurs here as well. The effect on the abdominal organs is the same. The entire torso muscles can be relaxed. Furthermore, the pose is said to promote blood flow to the head and can be helpful for ear problems, for example. Furthermore, Karna Pidasana can support stress reduction, promote nighttime sleep, thinking, and concentration, and can have a positive effect on thyroid disorders. Have fun practicing! Image © seenad / 123rf.com

Purna Dhanurasana - Full Bow

by Nick on May 14 2018
Purna Dhanurasana - Full Bow In (Hatha) Yoga, in addition to the well- known lotus position, there are many other different positions you can assume during meditation. This stretches your muscles and tendons and gives your body additional strength and energy. This is essential for your physical and mental health, especially if you sit for long periods every day. One of these poses—or asanas—is Dhanurasana. "Dhanu" translates here as "bow," because during this exercise, your body forms the shape of a more or less taut bow. This stretches your back, chest, and shoulder muscles, for example. Dhanurasana can also have a positive effect on your digestion. However, the pose can be difficult, especially for beginners, as it requires coordinating your hands and arms in an unfamiliar position and engaging different muscle groups. An easy variation of Dhanurasana is recommended. Advanced practitioners can try the "Full Bow" pose—or Purna Dhanurasana. Purna Dhanurasana - Instructions (You can also start with Dhanurasana to see how far your muscles can stretch.) Lie flat on your stomach on your yoga mat and breathe in and out calmly. Now exhale and bend your knees as far as possible. Your heels should touch your buttocks. Lift your upper body slightly and now grasp your ankles or toes from the outside (thumb between your big and second toe). Start with your right foot and right hand. Make sure your knees don't slide wider than shoulder-width apart. Now take a deep breath and lift your upper body and thighs. Slowly let your head fall back. Now pull your elbows forward until they meet in front of your face. Your toes should now touch your head. Start with the right side. Press your pubic bone deep into the floor. Breathe in and out deeply. Try to breathe into the back of your torso. Stay in this position for 20 to 30 seconds. Then exhale deeply and release. Variations and tips for this yoga position If you're new to yoga, your body isn't very flexible, and you have difficulty coordinating, you should start with a light version of Dhanurasana and avoid over-stretching your spine. You can use exercise bands or place a rolled-up towel under your thighs to help you lift them. Beginners should also ensure that their knees and feet are always shoulder-width apart. These parts of the body are often opened too wide, which can lead to knee problems and strains. Furthermore, the weight should be shifted to the lower abdomen, not the hips. You can perform Purna Dhanurasana after Bhujangasana and Salabhasana . These poses complement each other well. Advanced practitioners can also rock back and forth during Purna Dhanurasana. What ailments does Purna Dhanurasana help with? Purna Dhanurasana is a seemingly difficult, but also very effective yoga pose. It begins by gently massaging the abdominal area, which can help with constipation, upset stomach, or other gastrointestinal disorders. It also stimulates digestion, which can be beneficial for dieting, among other things. This pose can also help with menstrual cramps. Furthermore, Purna Dhanurasana stretches and/or strengthens numerous muscle groups, including the back and chest muscles, as well as the abdominal and thigh muscles. Furthermore, the exercise can promote spinal health. Psychologically, the open, upward-facing posture can primarily evoke a feeling of elevation and self-confidence. It also releases energy in the chest and throat area, which can lead to improved breathing. When should you not perform Purna Dhanurasana? The "Full Bow" pose requires considerable practice and good physical fitness, such as a flexible spine. For this reason, if you have back or neck problems, you should only perform Purna Dhanurasana after consulting a doctor. Pregnant women or those who have recently undergone abdominal surgery should also choose an alternative pose. Image © solstizia / 123rf.com
Yogaübungen im Sitzen: wertvolle Asanas

Seated yoga exercises: valuable asanas

by Nick on May 08 2018
Seated yoga exercises: valuable asanas The neck is an area of our body that often receives too little attention. It's often overshadowed by the back, which we all want to treat when it's tense or in pain. Yet our neck is a particular area where many problems can originate. Muscle tension here can manifest itself in headaches, shoulder and arm pain, and even insomnia. The neck is often strained or even overstressed in everyday life. You may notice this particularly clearly if you frequently work at a computer. There are many yoga exercises that help you strengthen your neck and also learn to relax. Seated yoga poses are ideal for this. We'll introduce you to some of them in this blog post. Four seated yoga exercises Yoga Mudra: Forward Bend in Lotus In Yoga Mudra, you experience a long neck at its finest. By bending forward, you not only bow to creation, which gives you roots and wings at the same time, but you also relax your neck, increasingly as you become more and more aware of the gentle stretching of this area in this pose. You also bend forward at your desk. But this lengthening of your neck is completely different from that offered by yoga exercises in a seated position: While mental work at your desk can lead to a tense neck and you often look left and right, Yoga Mudra is a true act of letting go. You sink deeper and deeper into this pose, lengthening and relaxing your neck area, and learning to let go more and more, physically and mentally. Bandha Padmasana: bound lotus pose The bound lotus pose is one of the seated yoga poses well-suited for advanced practitioners. It relaxes your neck just like the forward bend in the lotus pose, but the posture is a bit more intense: By tying your arms behind your lower back, you gently draw your shoulders down. This creates the freedom for the neck that you may have often heard in yoga or exercise classes with the phrase "shoulders away from your ears." Unlike hunched shoulders, the neck can be optimally relaxed, making the bound lotus one of the ideal seated yoga poses for the neck. Try it out and see how your neck feels in this pose! Garbhasana: Fetal Pose The fetal pose is one of the asanas that offers perfect protection and relaxation. Is there a more relaxing posture than that of the child in the womb? Child's pose, as it is also called, is naturally also one of the seated yoga exercises that can benefit your neck. A holistic exercise that helps you relax your body, mind, and soul and gives you strength for the challenges ahead in life. It is one of the seated yoga exercises that is also suitable for balancing after strenuous asanas or at the end of a yoga class. Virasana: Warrior Warrior pose is also one of the seated yoga exercises that can promote neck health and thus your well-being. Here, too, lowering your arms relieves pressure on your neck by increasing the space between your shoulders and ears, thus giving your neck freedom. Virasana is also one of the seated yoga exercises that also relieves pressure on your back. Hero's pose, as it's also called, also helps relax your legs after a long day at work. Your mind can also find peace in this position. If you wish, you can also practice meditation or breathing exercises (pranayama) in the warrior pose to regain strength and rejuvenate yourself. Image © iofoto / 123rf.com

Uddiyana Bandha: The closure of the abdominal wall by drawing in the abdomen

by Nick on Mar 06 2018
Uddiyana Bandha: The closure of the abdominal wall by drawing in the abdomen The Uddiyana Bandha exercise is suitable even for yoga beginners due to its simple execution. It can literally be translated as "locking" (bandha) of the abdominal wall (uddiyana). The goal of this exercise is therefore to draw the abdomen upward after an exhalation. The exercise is also intended to control the prana during the individual exercises. Due to its low complexity, this is a perfect binding exercise that can easily be integrated into an existing yoga program or could be used to enhance it. What could Uddiyana Bandha achieve? According to tradition, the exercise is considered one of the abdominal mudras for advanced practitioners, although from a purely physical perspective it is relatively easy to perform. Supposedly, the exercise massages the abdominal organs and can promote balanced digestion. At the same time, it is sometimes possible to find inner balance with the exercise, which in turn is considered a source of courage, enthusiasm, and self-confidence. Therefore, pulling up the stomach sometimes has more than just physical benefits. Whether this exercise appeals to you and triggers such potential benefits in you is something you will have to discover for yourself. Therefore, we would now like to show you how you could perform the Uddiyana Bandha exercise in practice. Please note, however, that there are generally several variations; here we will explain the most commonly used version. Step by step: How to perform Uddiyana Bandha To begin, get into a standing position with your hands on your thighs. Standing completely upright in the starting position, breathe in and out three to five times. Now bend forward with your upper body and place your palms on your knees. Stick your bottom out slightly and tuck your chin towards your chest. In this position, you can finally begin Uddiyana Bandha. Exhale completely once while placing your palms on your knees. Instead of breathing in again immediately, consciously and abruptly draw your stomach in. Since you have already exhaled at this point, your stomach will draw deep into your body, creating a kind of hollow space. True to the exercise, you not only draw your abdominal wall inwards, but above all upwards, which is ensured by the crouched posture. Remain in this position for a few seconds and then move back up while inhaling. It is important that the entire abdominal region is drawn towards the spine. It is best to try to find out for yourself how long you can stay in this position. However, Uddiyana Bandha is never about winning a competition or torturing your own body. Try to determine how long you can comfortably yet challengingly hold your breath after exhaling and pull the abdominal wall, including your internal organs, towards the spine. If you slowly reach your limits, do not try to push them too far; instead, exit Uddiyana Bandha. To end the exercise, stop sucking in your stomach so that your belly returns to its normal shape. At the same time, take a deep breath, stand up straight, and relax. You can repeat this Uddiyana Bandha exercise several times; we recommend about five times at this point. This exercise works best first thing in the morning, before you've had anything to drink or eat. To reap the full benefits, you should perform Uddiyana Bandha every morning. Because you haven't had anything to drink or eat before the exercise, it will be easier to suck in your abdominal region, ensuring that you don't disturb your stomach or intestines during digestion. Image © fizkes / 123rf.com

Tolangulasana: Finding balance in the scales

by Nick on Feb 19 2018
Tolangulasana: Finding balance in the scales Tolangulasana is the balance pose. It is one of the balancing poses that casts a fascinating spell just by looking at it. The effect lives up to its name: balance, equilibrium, and balance, both internally and externally, await you. Here you can learn more about this pose full of beauty and grace. The exercise in view In Tolangulasana, the body resembles the shape of a scale. One scale is formed by the upper body and head, which reach diagonally upwards. The other scale is formed by the legs, which are crossed in the lotus position and also lifted from the floor. The pelvis rests on the hands, providing grounding to the mat. The forearms and elbows rest on the floor, providing stability. The effects on body, mind and soul The name "Libra" already speaks to the balance this exercise provides. You feel grounded from below and protected from above. Through the balance this exercise provides, the equilibrium of your limbs, you experience a harmony that carries you through the day. Tolangulasana is also a very effective exercise physically. The muscles of the shoulders and arms are particularly strengthened, as they support you in this pose. By drawing in your stomach and pulling your head toward your chest, your abdominal and chest muscles are also strengthened. By contracting your abdominal muscles, the balance pose also affects your internal organs. The pressure created by contracting your stomach and limiting your legs and upper body gently massages the internal organs. This can be helpful, for example, if you suffer from bloating or constipation. What is the best way to practice the scales? For the Libra pose, you need arm strength and flexibility in your hips and knees. You can initially train both separately from this pose. Arm strength can also be achieved in Downward-Facing Dog or Cobra Pose , for example. You can train hip flexibility in the Swan pose, for example, which is practiced in Yin Yoga. Lotus pose is also a good way to prepare for Tolangulasana! What is the best way to perform Tolangulasana? First, assume the lotus position (Padmasana) . Then, lean back until you're in Matsyasana, or fish pose . Then, align yourself and assume the balance pose, which you hold for a few breaths. When you tuck your chin toward your ribcage in this position, you're in Jalandhara Bhanda . This chin lock is an important practice in pranayama. It's about holding the energy in the important area of the head and neck for a while. You'll find out if you experience any beneficial effects. If not, it's simply not the right time yet, and you can try it again later. Do what feels good! Contraindications for Tolangulasana You should avoid using the scale if you have any injuries or discomfort in the shoulder or arm area. You should also avoid knee or meniscus problems, as the knees are bent sharply. Hip problems are also contraindicated. Furthermore, you should not be pregnant due to the abdominal pressure and pressure on internal organs. In all these cases, you can ask your yoga teachers for advice. They have alternatives that will meet you exactly where you are in your practice and health. This is what defines yoga and makes it a practice for everyone! Image © djvstock / 123rf.com

Eka Hasta Bhujasana: the elephant trunk pose

by Nick on Feb 10 2018
Eka Hasta Bhujasana: the elephant trunk pose Some yoga poses seem to completely defy the laws of gravity, thus exerting a very special kind of fascination on the observer. Eka Hasta Bhujasana is certainly one of them. The "one leg over arm pose" conveys a feeling of weightlessness and practically motivates you to learn and imitate this pose. Here you will learn how to perform Eka Hasta Bhujasana correctly and what effects this asana has on body, mind, and soul. The name is (exercise) program Like many other names for yoga asanas, the name Eka Hasta Bhujasana comes from Sanskrit and already gives us a clear clue as to what the pose looks like. "Eka" means "one," "hasta" means "hand," "bhuja" is the word for "arm," and the term "asana" for "exercise" is surely familiar to you from your yoga practice. It is therefore an exercise in which the leg is positioned over the arm or hand. The weightlessness created by supporting yourself from the seated position places this exercise in the category of arm balances. In addition to Eka Hasta Bhujasana, the body-oriented name, this asana has another particularly endearing name in yoga. You're probably familiar with the tendency for poses in yoga to be named after animals. This arm balance is also often called "Elephant's Trunk," and if you look at this exercise in pictures or videos, you'll immediately see why. Get into the elephant trunk position You sit on your mat and consciously ground yourself through your sitting bones. Then you grasp the foot of one leg and pull it back with a bent leg. You will immediately feel the result: a wide opening of the hips on that side. Then you sink your arm under the raised leg and rest your upper arm in the back of your knee. For further stability in this asana, it is important that the back of your knee presses on the arm and that the hand on the same side is firmly grounded to the floor. You also ground the leg that is on the floor by pressing your heel into the mat and pulling the leg towards the hip joint. Now you can push off from the surface with both hands placed on the floor next to your hips and remain hovering above the floor for a while. Prepare well for Eka Hasta Bhujasana The Elephant Trunk pose requires two things from you: strength in your hands and arms, and the ability to open your hips wide. Yoga offers a diverse range of exercises to effectively improve both of these abilities. For example, you can practice hip opening in Camel Pose , Pigeon Pose, or Happy Baby Pose. You can improve hand and arm strength in Downward-Facing Dog or Crow Pose , which also introduces you to balance exercises. Holistic effect on body, mind and soul Eka Hasta Bhujasana is particularly notable for its noticeable hip opening and mobilizes your hip joints. It also strengthens the muscles in your arms and shoulders. However, you're essentially strengthening your entire core muscles, especially your abdominals, because a yoga balance exercise always starts from a strong core. Mentally and emotionally, you'll enjoy the weightlessness of the pose. This can positively influence unpleasant feelings like anxiety or stress. Even in conflicts with others, or perhaps even with yourself, the sensation of weightlessness combined with the loosening of your hips will bring you greater well-being. Therefore, always hold Eka Hasta Bhujasana for a few breaths. Note contraindications If you suffer from hip problems or arthritis in your fingers, there are valuable alternatives to Eka Hasta Bhujasana. Your yoga teachers will be happy to recommend them! Image © fizkes / 123rf.com

Sarvangasana - the Yoga Candle

by Nick on Feb 07 2018
Sarvangasana - the Yoga Candle Sarvangasana, also known as the shoulder stand or candle pose, is one of the most fascinating Hatha Yoga poses . The reason for this is its versatility: When you stretch your legs upward to support yourself on your elbows and shoulders, almost all parts of your body are activated. This also gives rise to the Sanskrit name of the asana. The word Sarvangasana is composed of the three terms Sarva, Anga, and Asana, which mean "all," "parts," and "posture," or "posture" for all parts of the body. But how is this yoga pose performed, what should you keep in mind, what other benefits does it have, and for whom is it more or less suitable? You will find the answers to these questions below. Shoulderstand Sarvangasana - classic inversion pose Sarvangasana is one of the 84 cardinal asanas. Shoulderstand is an inversion. Its opposite pose is the fish pose, Matsyasana . Inversions refer to postures in which your body is aligned so that your heart is above your head. You should never simply jump into this pose; you must assume the shoulderstand slowly and in a controlled manner. How to perform Sarvangasana? Step-by-step instructions: You lie on your back with your legs closed. Place your arms at your sides, palms facing down. As you inhale, lift your legs and pelvis. Lift your buttocks off the floor and firmly support your lower back with both hands. Continue lifting your back and legs while breathing rhythmically. Continue pushing your hands toward your shoulder blades and bring your chest as close to your chin as possible. Your back, hips, and legs should form a single line. Breathe into your belly and relax your feet and legs. Hold this position for as long as you feel comfortable. 20 to 60 seconds is sufficient to begin with. Over time, you can extend it until you reach three minutes. You come out of this position by lowering both arms and pressing them firmly into the ground. Bend your legs slightly back and slowly roll your back down, using your arms as brakes. When your buttocks touch the floor, you can slowly lower your legs to the floor with the help of your abdominal muscles. After shoulder stand, you can bend your legs toward your ribcage to release tension from your back. Reach your arms around your knees and grasp your other wrist with one hand. Take several deep breaths into your belly and then release your arms and legs. During Sarvangasana, you should maintain fluid movements throughout. Relax in the corpse pose. What are the benefits of shoulder stand? In Sarvangasana, you reverse the upright posture the body assumes when standing. This relieves pressure on the lumbar spine and leg veins, helping to prevent varicose veins. The neck is stretched and the shoulders are strengthened. The heart and circulatory system can also benefit from shoulder stand. The same applies to the thyroid. The pressure and increased blood flow harmonize and balance it. This can prevent hormonally-induced metabolic disorders. The improved blood supply to the brain has a positive effect on mental functions. Shoulder stand promotes calm and balance. Conclusion Shoulderstand has many positive effects: It can help you perceive your body in a new way. The exercise is rejuvenating and promotes harmony and a sense of unity. To perform Sarvangasana safely, a certain level of physical stability is required. You should be able to control your spine and joints in every pose to counteract the forces. This asana should not be performed if you have back or heart problems, high blood pressure, or eye conditions such as increased intraocular pressure. Image © dragonimages / 123rf.com

Pashchimottanasana or seated forward bend

by Nick on Feb 03 2018
Pashchimottanasana or seated forward bend Pashchimottanasana, also known as the seated forward bend, is considered a fountain of youth. The asana can also strengthen the immune system. You can therefore use the exercise to boost your defenses when a cold is looming. The back of the body is stretched upward. Learn more about the exercise's other benefits, what to keep in mind when performing it, and much more below. How is Pashchimottanasana performed? To prepare for Pashchimottanasana, stretch the backs of your thighs. To lengthen your arms, you can also use a 1.5-meter-long cotton strap placed across the balls of your feet. Then, sit on the floor in a long seat. Your legs are together and extended. Your toes are pointing toward your body or upwards. Beginners can sit on a raised surface, such as a cushion or a rolled-up yoga mat. Pull your gluteal muscles outwards on the left and right so that the bones of your pelvis are in contact with the floor. Place your hands next to your hips and then bring yourself into an upright position. Now inhale, stretch your arms and spine towards the ceiling and exhale. Then, keeping your back straight, bend forward. Your stomach should rest on your thighs to avoid straining your back and allow for deeper breathing. Your head remains in line with your spine. Place your arms next to your feet. Make sure your knees aren't bent and your soles aren't turned toward each other, as this will reduce the effect of the exercise. Relax your shoulders and hold this position for one to five minutes. To return from Pashchimottanasana, stretch your arms forward and, as you inhale, raise your upper body and arms into an upright position. Keep your spine straight. As you exhale, place your arms behind your back. What positive effects can Pashchimottanasana have? Pashchimottanasana, the seated forward bend, is a Hatha Yoga pose. It develops dedication and patience and, in addition to strengthening the immune system, can have many positive effects on the body: The leg muscles and back extensors are stretched, and the hip joints are activated. The spine is strengthened and mobilized, and blood flow to the pelvis improves. This has a positive effect on the sexual organs such as the ovaries and can prevent impotence. The abdominal organs can be stimulated, simultaneously harmonizing digestion. You can get rid of fat on the stomach and hips with this yoga pose. It can also strengthen the kidneys, which promotes the elimination of toxins. The Paschimottanasana forward bend can also have energetic and mental benefits: Thanks to deep breathing, the energy is directed upwards, and all the chakras located along the spine are activated. Pashchimottanasana is one of the most energetically powerful poses, especially when held for a long time. It calms the mind, and promotes patience, endurance, balance, and serenity. Conclusion The forward bend pose, Pashimottanasana, can have many positive effects on the body and mind. However, be sure to perform the exercise correctly. Don't bend your back or knees, and don't pull your shoulders toward your ears. Practice conscious, deep abdominal breathing. As you inhale, stretch your spine and direct your breath into your chest. As you exhale, activate your abdominal muscles and deepen the bend in your hips. Pashchimottanasana should not be performed if you have back injuries or problems such as a herniated disc, abdominal inflammation, or diarrhea. Caution is also advised during pregnancy . Image © kapu / 123rf.com

Shashankasana: from the rabbit to the headstand

by Nick on Jan 31 2018
Shashankasana: from the rabbit to the headstand The headstand is an exercise that many yoga practitioners aren't able or willing to perform right away. For many people, standing on their head is a challenge at first. A good exercise for you in this context is the rabbit pose. In Shashankasana, you also place your head on the floor, but without placing your entire body weight on it. This is why many beginners quickly feel confident in this exercise. Here you will find all the important information about the asana. The posture of the rabbit Just imagine what it looks like when you suddenly spot a hare or rabbit in a field. These animals often crouch in a hollow, fearing predators, but their ears, as these velvety rodents' ears are called, clearly point upwards. You can easily imitate this pose in Shashankasana. Using your heels, knees, and head, you distribute your body weight across three areas. Clasp your hands behind your body. Depending on how intense a stretch you want, you can either stretch your arms vertically upwards or extend them slightly further above your head. Take Shashankasana The best way to get into the rabbit pose is from Vajrasana, the diamond pose . Another possible starting position is on all fours. You place your head between your hands on the mat or any other surface of your choice. A non-slip surface is important! Position the crown of your head in the middle and take the time to check this position and adjust it if necessary. Only when it feels good do you release your hands and cross them behind your back. Then you stretch your arms and choose the stretch for your shoulders and chest by stretching the arms vertically upwards or a little further back. Stay relaxed in this position for a few breaths and then release. Child's pose is a good opportunity to reflect. Stay here for a while too. What Shashankasana does to your body You'll likely feel the stretch in your shoulders and chest immediately. It's a valuable counterbalance to many professional activities, such as those that require you to spend the entire day hunched over at a computer or carrying heavy loads. Your shoulders will improve their mobility, and your neck will be beneficially strengthened. All of this can help if you frequently suffer from tension or pain in the shoulder and neck area, or from headaches. After a while in Shashankasana, you'll experience a soothing relaxation of your back. Letting go is the principle here, which can be a valuable aid in many yoga exercises. When you consciously breathe into your belly, Shashankasana also gently massages your abdominal organs, which can have a positive effect on your digestion. Energy and relaxation through the rabbit Energetically, Shashankasana affects your brow and crown chakras . This is closely related to the improved blood circulation your head experiences in the rabbit pose. This circulation also affects your mind, for example, by improving your ability to concentrate. The increased blood flow is also a welcome boost for your eyes. Fatigue can also be improved by the increased blood flow. Furthermore, the peaceful rabbit pose also brings you relief from the stress and hectic pace of everyday life, providing you with the calm we all need for our well-being in your very own rabbit hollow. Harmony and balance reappear in Shashankasana! Image © fizkes / 123rf.com

Ardha Bhekasana - Half Frog

by Nick on Jan 24 2018
Ardha Bhekasana - Half Frog Half Frog, also known as Ardha Bhekasana in Sanskrit, is a variation of Cobra Pose that increases mobility, flexibility, and strength. Your shoulders, legs, and back are most affected in Ardha Bhekasana. Ardha Bhekasana stretches your entire upper body and strengthens the back muscles. In this pose, your chest and the entire front of your body are opened, and your lower abdomen is stretched, giving your internal organs room to expand. By opening your lungs, you can take particularly deep breaths in this pose. Half Frog also stretches your thigh muscles and the muscles around your ankles, making these parts of your body more flexible. Ardha Bhekasana strengthens the shoulders, arms, and neck. The focus during the practice is also on breathing. The exercise is particularly good for women because it can relieve uterine problems and help with menstrual irregularities. It also helps people with flat feet or fallen arches. At the same time, Half Frog pose stimulates your digestive system. The exercise also has a positive effect on the second chakra , which is activated by Ardha Bhekasana, thus stimulating sexual energy. However, avoid Half Frog pose if you suffer from insomnia, migraines, or blood pressure problems. This pose also has a negative effect on the affected body parts—shoulders, back, and knees—if they are injured. If you have knee pain, be gentle when applying pressure to your knuckles. The correct execution of Ardha Bhekasana Before you begin Ardha Bhekasana, check which nostril you breathe through more actively. Then, assume Bhujangasana, Cobra Pose. To do this, lie flat on your stomach, face down. Support yourself on your forearms by placing them on the floor. Your elbows are under your shoulders. Breathe in and out deeply here. Place your hands directly in front of you, palms down. Your torso is in Cobra Pose, chest up. Your legs extend straight behind you. Now begin Ardha Bhekasana by spreading your legs about hip-width apart. Once you've noticed that your right nostril is active, go into Half Frog Pose by moving your left hand to your right elbow until your left arm is in front of you. Now bend your right leg and bring your foot towards your buttocks. You can now raise your right hand and grab your right foot, pulling it toward your hip. Apply gentle pressure to open the hamstring. The stretch will increase if you pull the foot down toward the floor next to your hip. Make sure your elbow is close to your ribcage and not pointed out. Turn your hand over until your fingertips point toward your torso. This rotation will bring your elbow further up and position the heel of your hand against your leg. Now continue to stand up through your chest. Stay in Ardha Bhekasana for at least three deep breaths, then repeat Half Frog on the other side. Tips for the Half Frog If your back isn't strong enough for the exercise, you can place a pillow under your ribs to help you maintain the position. When performing Half Frog, try to keep your body straight and avoid twisting to the side. Deep breaths will help you settle into the pose. You can also modify the exercise by extending your lower arm. This will further intensify the stretch. You can also prepare for Ardha Bhekasana by practicing Bow Pose , Sphinx Pose, and Hero Pose . Image © summer78 / 123rf.com