Yoga BLOG

Chakarasana: Wing Pose and Wheel

by Nick on Jun 02 2017
Chakarasana: Wing Pose and Wheel Chakarasana (alternatively: Chakrasana), also known as "the wheel," "the bridge," or "the wing pose," is defined by the grounded hands and feet, the inverted head, and the extension of the upper body. The focus is on the back and spine, as well as the shoulders and neck. The arms, legs, respiratory system, and abdominal organs also experience tension and a unique "twist." It should be noted that Chakarasana is not suitable for people with a known heart condition, dizziness, or severe high blood pressure. They should seek an alternative exercise. How to perform the exercise step by step In the starting position, lie on your back with your legs bent. Pull your feet towards your backside; you can also grasp both ankles with your hands to relax. In the next step, bring your hands behind your shoulders and twist them so that your fingers touch your shoulders or are pointing towards them. Your elbows are pointed and pointing towards the ceiling. Your legs lift up, you stand on your tiptoes and raise your buttocks so that your knees point forward like a spear. Then you lift your chest and place your head on the floor. Your hands are now parallel to your head, directly next to them, and your gaze is horizontal to the floor. You also lift your buttocks, so your knees are no longer at such an acute angle as before. You can also stand completely on your feet. Your body now forms a kind of bridge or takes on the shape of a half circle. The position you're in during Chakarasana will be your final pose, provided your arm muscles aren't too strong. However, if you're more experienced in yoga or feel your fitness is good, you can extend your arms almost completely for additional tension, while keeping your elbows slightly bent. This ensures that you maintain sufficient tension in your arms and avoids the risk of them suddenly bending in an unhealthy way under the strain. You can extend your legs as far as possible, lifting your bottom more and more. The bridge you formed is still a bridge, but it's much steeper on both sides. You've now reached the final position in Chakarasana. You can now hold this position for at least three to six breaths before slowly and carefully coming out of the pose. Please be careful not to come out too quickly to avoid tension. Chakarasana: additional variation As an additional variation, you could press your legs together from the basic position while keeping them straight . This stretches your back even further and adds tension to the exercise. You can also pull your hands up to your heels, essentially creating a complete circle with your body. This variation of Chakarasana should only be performed if you have already successfully mastered the basic position and are looking for further variations. What positive effects can Chakarasana trigger? The entire body is stretched, including the spine, legs, and arms. Chakarasana may stimulate the activity of individual organs in the abdomen or deepen your breathing. It's also possible that Chakarasana will further boost and strengthen your circulation. Stretching the abdominal region may improve your digestion. Chakarasana is also thought to have a positive effect on people with poor posture. Image © fizkes / 123rf.com

Parsva Bakasana - side crow pose

by Nick on May 30 2017
Parsva Bakasana - side crow pose Parsva Bakasana is also known as Side Crow Pose. In this yoga pose, the body's weight rests on your hands and wrists. The challenge lies in maintaining balance. The exercise is structured like a seesaw, with the pivot point between your hands. While the head is on one side of the seesaw, the buttocks and feet are on the other. Below, you'll learn everything you need to know about Parsva Bakasana, how to perform the exercise, what to keep in mind, and what benefits you can achieve. How does Parsva Bakasana work? - Squat on your mat and bend your right leg. The sole of your right foot should be on the inside of your left thigh. - Place your right hand on the floor behind your right buttocks. Then bring your left elbow to the outside of your right thigh. - Pull your stomach up and go back over your right shoulder. - Let your left elbow sink down next to your right thigh. Your upper arm and the outside of your knee are now connected. From this position, move into Parsva Bakasana. - Then push your body weight over your right foot until your heel comes off the ground. - Stand on the balls of your toes. Then bend your left leg and pull your left foot toward your right until the insides of your ankles touch. - Place your left hand about 25 centimeters in front of your big toe on the right side. - Now place your right hand under your right shoulder. Then open it slightly. - Now bend your left elbow slightly and push the weight forward. Keep your upper body centered between your hands. When you're ready to "fly," slowly lift your feet off the mat. As your chest moves forward, your feet will automatically leave the floor. Exhale and maintain balance. It's best to keep your gaze fixed on a specific point on the yoga mat . - To come out of Parsva Bakasana, shift your weight slightly backward. Then land back in a squat. What tips are there for beginners? While performing the exercise, look forward, not down. Pressing your fingertips into the floor will relieve pressure on your wrists. Placing a yoga block under your feet will make it easier to move in and out of the pose. It's often difficult to maintain balance at first. You can place a blanket on the mat in front of you. A partner can also help you at first, for example, to avoid falling over. Anyone with pain or injury to their wrists or shoulders should not perform Parsva Bakasana. The same applies to pregnant women . What positive effects can you achieve with Parsva Bakasana? Improve endurance, coordination and balance Promoting concentration Strengthening the hands, forearms, upper arms and shoulder girdle Relief of the shoulder and neck muscles Improve blood circulation in the upper body Improving lumbar spine flexibility Opening the hip Stretching and extending the back Strengthening the abdominal muscles and the adjacent organs Conclusion That's everything you need to know about Parsva Bakasana. During this exercise, the entire body is supported by the hands, while the shins rest on the upper arms and the feet are stretched out. This yoga pose will give you the feeling of flying. It's recommended to warm up your back beforehand. Maintaining balance can be a bit difficult at first. But with time, it will become easier. Parsva Bakasana increases self-confidence, courage, and willpower. Image © fizkes / 123rf.com

Urdhva Kukkutasana - the rooster pose facing upwards

by Nick on May 26 2017
Urdhva Kukkutasana - the rooster pose facing upwards Perhaps you've seen or even practiced Kakasana, the Crow Pose , in a yoga class? The feeling of finally lifting your feet from the ground and floating in the air after some time of practice is an overwhelming experience for many yogis. Urdhva Kukkutasana—an exercise also named after a winged animal—is usually a bit more difficult to perform: In the upward-facing rooster pose, the legs and feet in the air are also positioned in the lotus position, unlike the crow pose. Here you will learn a lot about this advanced exercise, which is part of the third series of Ashtanga Yoga . Name from Sanskrit Like most yoga poses, the upward-facing version of Kukkutasana is derived from a Sanskrit term for an animal. As always, the word for the pose ends with "asana," meaning "posture" or "position." "Kukkuta" is the rooster, and "urdhva" means "upward-facing." Urdhva Kukkutasana is the rooster facing upward. As with downward-facing dog, the name of an asana tells us which animal is represented and what it does. The fascination of floating In Urdhva Kukkutasana, you are anchored to your mat only by your spread hands. The rest of your body floats in the air, suspended in perfect balance by your arms. Up there, in a pose that, to the admiring observer, seems to defy all laws of gravity, you experience "Stira Bhaga," the "sublime tranquility" of the yogi. Holistic effect in the upward-facing tap Of course, this pose isn't easy for many yogis to practice right away. But it's worth learning because of its effects on body, mind, and soul. Physically, in Urdhva Kukkutasana, you train the strength of your arms as well as your core muscles, i.e., your abdominal and back muscles. Balancing in this upward-facing rooster pose also improves your coordination skills, especially your balance. You'll also benefit mentally and spiritually from this advanced Rooster Pose. Urdhva Kukkutasana not only brings you external balance, but also internal equilibrium. Advanced yogis even use this pose for meditation! Making the decision to finally lift your feet off the ground requires a great deal of determination and courage—all factors that will also benefit you in your personal and professional life. Physical requirements To train the skills for Urdhva Kukkutasana, you need asanas that provide you with the strength and flexibility specifically required for this pose and improve your balance. For balance, as you've already read above, Crow Pose is a related exercise. It's easier to perform and gives you the courage to launch your body into the air while standing on just your hands. You can gain the strength you need in your core and arms from a whole range of yoga poses. Even simple exercises like downward dog or plank pose train the necessary muscles. The flexibility you need for the crossed-legged lotus pose comes primarily from your hips. Here, on your journey to the upward-facing variation of Kukkutasana, your yoga teachers will show you the many possibilities that promote improved hip opening. These can include active postures and stretches, but also passive fascia stretching in Yin Yoga poses. Safe in the cock position When practicing the upward-facing Rooster Pose, you can place a mat or cushion in front of your body to provide a soft cushion if you lose your balance. To get a feel for the correct posture without anxiety, you can also ask a teacher or fellow yogi for assistance. Image © fizkes / 123rf.com

Visvamitrasana - The path to the balancing side angle

by Nick on May 18 2017
Visvamitrasana - The path to the balancing side angle Visvamitrasana is an advanced pose that combines challenging balance with a positive body awareness. This balancing side angle pose, as it's known in German, is intense, challenging, and one of those poses that requires not only flexibility but also support. Here you can find out how to get into the side angle, how to prepare yourself and what advantages the position offers you. Work for head and body - Visvamitrasana in application Physically, this asana offers many benefits, but it also requires strength, coordination, and a willingness to fall. This can certainly happen when preparing for the balancing side angle. Visvamitrasana simultaneously opens the hips, stretches the Achilles tendon and thigh, and improves balance and arm support—all while opening your torso through the twist. Due to the intense stretch, Visvamitrasana should be avoided if you have existing injuries or impairments of the wrist, leg muscles or hip socket. Asanas that are good for preparation include Hanuman, Prasarita Padottanasana , or Vasisthasana . A certain ease in the side plank and flexibility in the thighs are essential for achieving the correct position on your own. From there, it's only a short path to proper balance. In addition to the physical benefits, Visvamitrasana also allows you to train your entire body's coordination and increase strength, patience, and balance. Design and position First of all, you should make sure that you have warmed up sufficiently before starting the exercise; this is the only way to ensure the necessary flexibility and integrity of the muscles. First, take a wide lunge forward with your right foot, allowing you to slightly twist your left foot. Now bend your right knee slightly and press your right shoulder against your right inner thigh. Stay in this position for a few breaths, gently rocking your hips back and forth to prepare your muscles and joints. When you feel flexible enough, bring your right shoulder under your front knee. With your right arm, reach around your shin and onto the outside of your foot. Your hand should touch the floor, as should both of your feet. Remain in this position for a moment and then shift your weight back and forth between the support points, slowly shifting the force to your right hand, away from your front foot. When there's barely any weight left on your right foot, lift it off the floor and bend your leg. Transfer your foot to your left hand—you can rest your weight on your upper arm during this process. Grasp the outside of your foot with your left hand and begin to straighten your leg. During this phase, maintain good posture, pull your shoulder blades back, and rotate your biceps and elbows toward the mat. By slowly extending your leg, you now also stretch your side ribs, make sure that your head naturally lengthens your spine and turn your left elbow towards the ceiling to open your upper body. After taking a few breaths in Visvamitrasana, slowly bend your front leg back and lower your foot to the floor. Repeat the exercise on the other side. Visvamitrasana - The exercise alone is reward enough The asana Visvamitrasana is one of the more challenging positions and will require a lot of practice before you can hold the position cleanly and for a longer period of time. Visvamitrasana is extremely rewarding, and simply performing the pose correctly is a deeply satisfying feeling. By opening your ribs, stabilizing your arms, and stretching your legs, you can sustainably improve your body awareness and coordination. You'll probably experience firsthand that Visvamitrasana is a real balancing act a few times. Landing on your bottom isn't an uncommon side effect, but performing it correctly is more than rewarding. Image © byheaven / 123rf.com
Eka Pada Shirshasana - Fuß hinter dem Kopf

Eka Pada Shirshasana - Foot behind the head

by Nick on May 12 2017
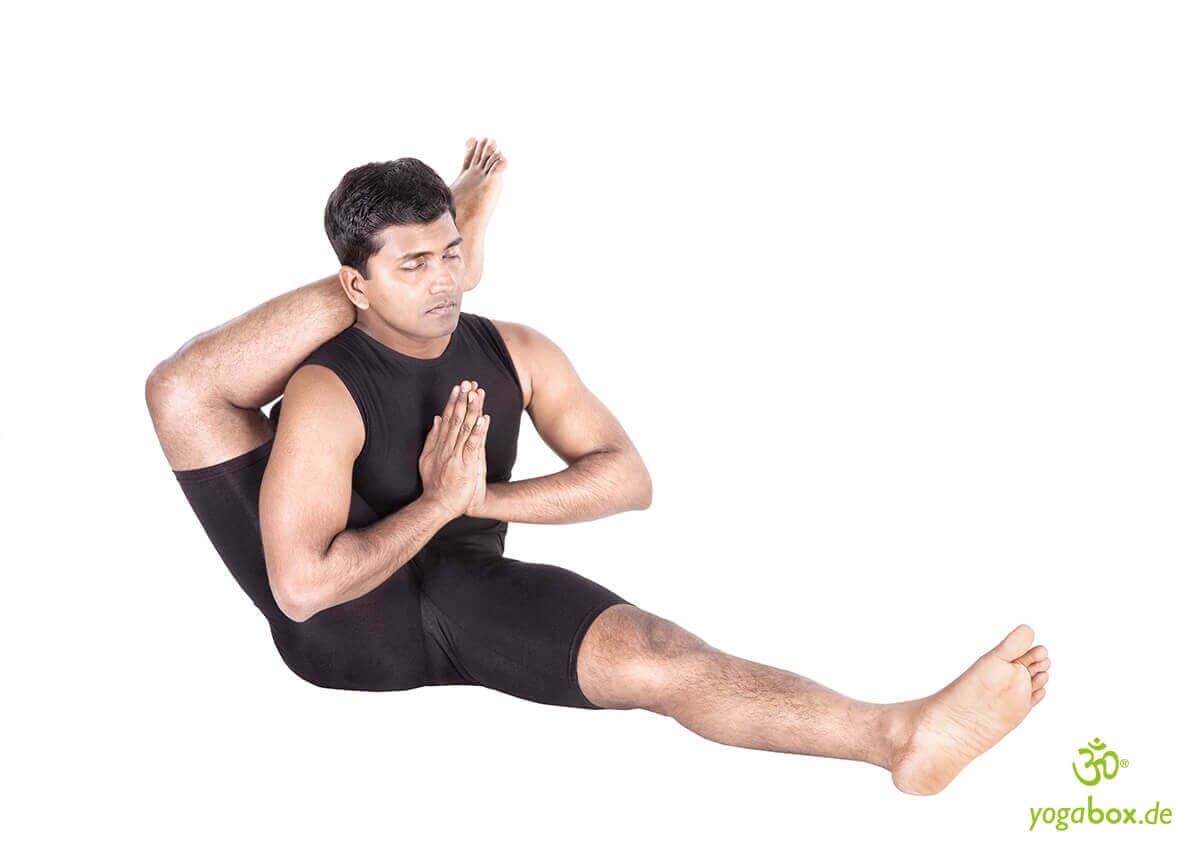
Eka Pada Shirshasana - Foot behind the head Eka Pada Shirshasana not only looks elegant, but is also one of the essential yoga exercises that promotes mobility and flexibility of the hips. The Eka Pada Shirshasana pose involves placing the foot behind the head. This exercise has many benefits and can be easily performed even in a small space, but it also requires a great deal of flexibility and a certain amount of patience. The execution of Eka Pada Shirshasana The starting position is Dandasana with your legs stretched out. Make sure your lower back is straight and that you're sitting evenly on your sitting bones. First, bring your right leg toward your body, bending your knee outward. This opens your calf toward your body. Grab the sole of your foot with your left hand and the inside of your calf with your right hand. While pulling your foot toward your head with your left hand, extend your leg with your right hand. Roll your butt into the floor and straighten your back as you pull your leg into a vertical position. Holding this position, grab your lower leg with your right hand and your ankle with your left hand over your foot. By pushing your shoulder forward slightly and simultaneously twisting your leg, pull your lower leg behind your head. The movement should originate in your hip and not be caused by pulling on your foot. If your foot is behind your head, straighten your head and thus complete the leg stretch. You can initially stabilize your foot with your left hand. Finally, you should release the foot. Breathing calmly and with control in this position will help prevent cramps. Once you have reached the final position, concentrate on your balance and calm breathing - now repeat the exercise analogously on the left side. As a beginner, you can also try Eka Pada Shirshasana lying down. Here, lie flat on your back and follow the execution as usual. If you reach your limit, hold the leg in the position and allow your body to sink deeper into the pose with your breath. If your knees reach the floor, you'll have a good starting position to attempt the correct execution. A position for advanced and professional players Don't worry: Eka Pada Shirshasana is often a difficult exercise even for advanced yogis, as it requires a high degree of flexibility, stability, and calmness. In addition to several months of yoga experience, you should also work specifically on stretching your outer thighs and hips. Forward bend poses (like Supta Padangusthasana) will help you slowly build the necessary flexibility. It is also completely normal that you do not have the same mobility in both legs. The foot behind the head position is extremely intense, but if the intensity turns into pain, you should definitely stop. These are the benefits of Eka Pada Shirshasana Due to the strong stretch during this position, Eka Pada Shirshasana helps you achieve high mobility in your back, hips and legs. Because the foot is above the head, you can also achieve better blood flow, boosting circulation and digestion. People who suffer from tremors and nervousness can benefit from Eka Pada Shirshasana. Instructions for implementation Because Eka Pada Shirshasana is such an advanced pose and requires a lot of control and flexibility, you should avoid it under certain circumstances. Injuries to the knees, hips or spine can flare up again when performing the exercise. Under no circumstances should you "force" yourself into the pose prematurely—Eka Pada Shirshasana requires practice and patience. Progressing too quickly or working with cold, unstretched muscles can lead to overstretching and injury. A perfect exercise Eka Pada Shirshasana is one of the most challenging and beautiful poses in yoga. The practice requires balance, calmness, flexibility, and a high degree of discipline—but Eka Pada Shirshasana gives you just as much in return. Image © byheaven / 123rf.com

Kurmasana - the yoga turtle

by Nick on May 04 2017
Kurmasana - the yoga turtle Like every yoga exercise, Kurmasana is the expression of an image. For this exercise, you imitate the shape of a turtle. This exercise is dedicated to Vishnu, the preserver of the universe. The pose is used in Indian mythology, among other things, as a symbol of overcoming. Metaphorically speaking, one should cross obstacles as a turtle with caution yet with strong will. There are several variations that allow you to perform Kurmasana, both as a beginner and as an advanced practitioner. Kurmasana - how to become a yoga turtle The exercise symbolizes flexibility and, at the same time, the withdrawal of the senses and mind inward. This will also become apparent later in the position. As a preliminary exercise, you could perform a twisting Janu Shirasana to warm up and mentally prepare for the turtle pose. To get into the pose, first assume the starting position. This is a squatting position with your feet parallel to your hips. Reach for your toes with your hands. Now slowly move into Kurmasana by pulling your arms under your still bent knees. Pull your right arm under your right knee, and do the opposite on the left side. Once you have brought your hands through your knees, place your hands flat on the floor with the backs of your hands touching it. If you are particularly flexible or have already had relevant yoga experience, you can twist your arms slightly by placing your palms on the floor instead of the backs of your hands. This will create further tension in your body and at the same time bring you back to your normal basic position. In the next step, you should now raise your heels so that the soles of your feet are off the floor and your toes are pointing towards the ceiling. Now slowly slide your feet forward, shortening the angle in your knees. Do this as far as you can and as far as feels comfortable, yet still challenging. As always, the goal of Kurmasana is not to inflict pain on yourself. If you can't stretch your legs out fully, that's okay. Instead, set yourself the goal of gradually moving closer to the actual Kurmasana position, inch by inch. When your legs are as straight as possible, so that there is only a slight bend where your arms rest under your knees, you have reached the final Kurmasana position and are now a yoga turtle! You can vary the pose later, for example, by folding your hands behind the small of your back instead of laying them flat. For a sleeping turtle, cross your feet over the back of your head. Particularly experienced yoga practitioners can even perform the turtle pose while sitting or standing. In these expert variations, you raise your head. While seated, you support yourself with your tailbone and hands; while standing, you use only your hands for support, while your bottom hovers in the air. However, these variations of Kurmasana are really only suitable for people who have already had experience with complex yoga poses and have performed them successfully. For everyone else, a regular version of the turtle pose or simpler variations, such as crossing your hands or feet, are sufficient. What effects can the turtle trigger in you? The exercise engages the abdominal region . It can therefore improve digestion and detoxify the liver and pancreas. It may also sustainably strengthen your immune system. This exercise may increase your physical flexibility, as the body is stretched and extended. You may even train your quadriceps (leg extensors) through the sustained strain. The turtle pose may also open your spinal chakras and have a generally harmonizing effect. The exercise is considered one of the yoga poses that can awaken energetically effective asanas. Image © dimol / 123rf.com

Tittibhasana - the firefly pose

by Nick on Apr 25 2017
Tittibhasana - the firefly pose Tittibhasana, the so-called Firefly Pose, requires strength in the upper body and thighs. Tittibha stands for a small bird that lives on the cliffs; the asana is the position or posture, and together the word Tittibhasana describes the pose of the Tittibha bird. It may be a bit difficult at first, but this challenging pose can be practiced well. But how exactly is it performed, what should you keep in mind when practicing the Firefly Pose, and what positive effects can you achieve with this yoga exercise? You'll learn all about this below. How is Tittibhasana performed? Begin the exercise standing with your legs slightly bent and feet hip-width apart. Place your right hand between your legs, grasping the outer side of your right calf. Push your right shoulder behind your right calf. Repeat with your left leg and left shoulder. When both shoulders are aligned behind your legs, wrap your forearms around your shins and place your hands on the tops of your feet, fingers pointing forward. Push your thighs toward your torso and let your head hang. Bend your legs further, place your hands on the floor behind your feet, and lower your pelvis until your arms form a seat. Look straight ahead and carefully lift your feet off the floor. Push your thighs toward your torso and strengthen your upper arms. Then extend your legs. Pull your shoulders back and lift your gaze. Remain in this Tittibhasana pose for about 15 seconds. Breathe slowly and return your feet to the floor on an exhalation. Relax thoroughly. What should you keep in mind when practicing Tittibhasana? When you perform Firefly Pose, your stomach and intestines should be empty. Therefore, you shouldn't have eaten anything for about five hours beforehand. This should allow the food to be digested and you'll have enough energy for the exercise. For this reason, it is ideal to practice it in the morning. Beginners can choose the slightly easier version and place your hands on blocks. If you are afraid of falling, you can place a blanket under your buttocks . To deepen the pose, you can stretch your arms and bend your upper back. It is not always possible to perform it immediately. However, with a little practice, it is easy to learn because the pose is easier than it looks. This pose should be avoided if you have problems with your shoulders, wrists, or hamstrings, as these areas are stressed. What positive effects can you achieve with Tittibhasana? Stretching the spine Strengthening the arm, shoulder, back and abdominal muscles Opening of the posterior thigh muscles and groin Strengthening of various organs such as kidneys, liver, spleen, gallbladder and urinary bladder Promotes balance, equilibrium and concentration Improve balance Calming the nerves Firefly pose can relieve stress and depression Conclusion This is everything you need to know about the Firefly Pose (Tittibhasana), how the exercise is performed, and what benefits you can achieve with it. It's a very challenging pose that focuses on strength, power, balance, muscular endurance, and flexibility. The body parts involved are the torso, legs, shoulders, arms, joints, and back. Tittibhasana provides the foundation for practicing a clear, sensitive, yet powerful approach to your life. Image © fizkes / 123rf.com

Bhujapidasana - arm pressure pose

by Nick on Apr 03 2017
Bhujapidasana - arm pressure pose The Sanskrit name "Bhujapidasana" refers to an arm press pose in which the body is supported by the arms rather than the legs. This pose is therefore one of the more difficult exercises, primarily due to the balance and muscle strength required, and is recommended primarily for advanced practitioners who have already mastered easier yoga poses . The exercise directly affects body parts such as the joints, back, arms, shoulders, legs, and torso. One thing you should know in advance: this exercise is not recommended for people with known shoulder or wrist problems, as both areas are subject to significant strain. People with high blood pressure should also avoid Bhujapidasana and seek alternative exercises instead. Execution of the arm pressure pose "Bhujapidasana" Before you actually enter the Arm Press Pose, you should warm up your body and mind with a few simple exercises. As mentioned at the beginning, Bhujapidasana is definitely intended for advanced practitioners and requires considerable physical strength. Therefore, it is not advisable to perform this exercise "off the cuff." To prepare, you could, for example, perform the " Locust Pose " on your yoga mat or a simple forward bend. It is also recommended to loosen the wrists and shoulders with rotating movements. This will prevent localized pain later and ensure that your body, especially the stressed joints, are truly prepared for the upcoming strain. Using a yoga mat is also highly recommended. In the first step, you go into a forward bend without fully straightening your knees. Your feet should be positioned roughly evenly with your hips, leaving a small gap between them. Now bend down and touch your yoga mat with your palms, keeping your knees relaxed. Then, reach behind your ankles with your hands, passing along the insides of your legs. In this position, breathe in and out deeply two or three times to prepare for the next steps into Bhujapidasana. In this position, also consciously focus on your balance, as this will also be required in the next steps. In the third step, place your hands, which are behind your heels and ankles, flat on the floor. Your palms should be touching the yoga mat. Then gently bring your fingertips toward your heels. Make sure that the creases in your wrists form a line. Once this is the case, slowly lower your relaxed knees and virtually squat down. Once you are confident that you have a secure footing on your hands, cross your ankles and press your thighs toward your shoulders. Keep your gaze directed forward the entire time. Now lift your heels, so that your entire body weight is supported only by your hands, wrists, and shoulders. You are now in the final Bhujapidasana pose, in which you should inhale and exhale deeply at least three times. If your balance and physical strength allow it, it is advisable to remain in the Bhujapidasana pose for five deep breaths. You can then slowly move out of the position by reversing the steps just described until you return to the original position. Benefits and Variations of Bhujapidasana You can make the exercise a little easier by resting your hands on a yoga block. Advanced practitioners looking for a little more tension can extend their arms and bend their upper back. However, this variation is not intended for people trying the arm press pose for the first time. The exercise can strengthen the arms, wrists, shoulders, and even thighs. At the same time, it opens the back muscles. It's possible that the Bhujapidasana pose also balances the nervous system, and the pose could also have a positive effect on circulation and digestion. Image © fizkes / 123rf.com

Pincha Mayurasana - forearm stand

by Nick on Mar 31 2017
Pincha Mayurasana - forearm stand Pincha Mayurasana is a yoga exercise that exudes lightness and elegance. As the name suggests, this forearm stand turns the yoga world on its head. Getting into this asana isn't easy at first. It requires some determination and patience. There are a few tips and tricks for performing this empowering asana. These are explained in the following guide. You'll also learn what to pay attention to and who the exercise is suitable for. What does Pincha Mayurasana mean? Pincha means "feather" and Mayura means "peacock," which is one of the world's most admired birds. Pincha Mayurasana thus represents the elegant "Peacock Feather Pose." The many eyes of the feathers are represented in this pose by your third eye. This impressive pose, named after India's national bird, represents beauty, splendor, and pride, and this is precisely what it embodies. The asana is also frequently practiced in children's yoga . The forearm stand, like the handstand, requires considerable body control and balance. How does Pincha Mayurasana work? The starting position is in the heel seat , in the middle of the yoga mat . Bend forward and place your forearms parallel to each other on the floor. With your palms flat and your fingers spread, your elbows are at the same height. Straighten your knees so that your buttocks are pointing towards the ceiling. Place your feet parallel to each other. With your legs straight, move your feet forward until your upper arms and shoulders are vertical. Look towards the floor. Keep your jumping leg on the floor. Swing your foot and pull your legs up one after the other. Your toes are stretched out and pointing towards the ceiling. Stretch your hips and tense your abdominal muscles. Your upper and lower body form a line. It is enough to hold your balance for a few seconds before you slowly lower your feet towards the floor, one after the other. You will be sitting in the heel seat again at the end and you will feel the power. What effects can you achieve with Pincha-Mayurasana? Forearm stand is one of the inversion poses. The usual perspective is turned upside down. Due to the pressure of the elbows, the main artery is compressed. This leads to increased blood flow. The shoulders and arms, as well as the liver, stomach, and pancreas, can be strengthened. The spine becomes more flexible and stretched, especially the thoracic vertebrae. Furthermore, the asana opens the chest, can instill confidence and strength, and can help combat stress and anxiety. What should you keep in mind when doing Pincha Mayurasana? You perform Pincha Mayurasana on a yoga mat. It's a slowly building yoga pose, so jerky and hasty movements from the legs should be avoided. Forearm Stand is all about gentle and flowing movements. You should warm up a bit beforehand. During the exercise, the energy comes from the fingers and hands. It flows through the arms to the entire body. Conclusion The yoga exercise Pincha Mayurasana is ideal for gaining strength in the abdominal, neck, and back muscles, as well as strengthening the shoulders, knees, pelvis, and legs. It also helps you develop your balance and self-discipline. Forearm stand, you need strength in your arms. If you struggle at first, be patient, as it's a matter of practice, determination, and strength. Regularly practicing Pincha Mayurasana will lead to success. Balance and a strong core are important. Image © fizkes / 123rf.com

Ashtavakrasana - the eight-angle pose

by Nick on Mar 17 2017
Ashtavakrasana - the eight-angle pose Ashtavakrasana, also called the eight-angle pose, is a very difficult asana, but it can produce a variety of positive physical and mental effects. Named after the sage Ashtavakrasana The exercise is named after the sage Ashtavakrasana, whose body was bent in eight places. Hence the name Ashtavakrasana, as "asta" means eight and "vakra" means bent. This pose is an arm balance suitable only for advanced practitioners and is rated at the highest level of difficulty. Ashtavakrasana is meant to symbolize the sage's bent appearance and requires considerable strength in the arm muscles. Practice leads to success First, get into a cross-legged position . Now, use your arms to pull your right knee up to your chest and bring the sole of your right foot to your left elbow. Then, wrap your right arm around your right knee and bring your hands together to hold your leg in place. It is important that you maintain a straight posture and drop your shoulders. Open your hips by swinging your shins. Place your right hand under your right calf and bring your right leg over your right shoulder. Place your palms on the floor and cross your ankles. Bend your elbows and bring your legs together at the right upper arm. Stretch your chest forward and support your weight with your hands. This pose should be held for at least 30 seconds and can be repeated up to five times a day. Health benefits of Ashtavakrasana The eight-angle pose primarily trains strength, balance, and flexibility of the arms, legs, joints, shoulders, and torso. The pose is very strenuous for beginners, but with practice, it becomes increasingly easier. This yoga asana trains the body holistically, and positive effects can include muscle building and joint strengthening. Ashtavakrasana is said to make the body strong and the mind calm; it trains endurance and can improve blood circulation. The spine is stretched, allowing it to free itself from its rigid, bent posture. Overall, the eight-angle pose is a strength exercise, but with good fitness, it can have extremely positive effects. Beginners can use a variation of Ashtavakrasana to reduce the effort required: This involves leaning the body against a wall to relieve pressure on the hands. As mentioned, this asana is a challenging pose. If you have pain or injury to your wrist or shoulder, or are suffering from disc problems and/or other back problems, you should not attempt this pose. Conclusion As an exercise for advanced practitioners, the challenging Ashtavakrasana is highly recommended because it trains strength and endurance and can therefore have a truly significant physical effect. It also balances the mind, calms you down, and allows you to switch off from the hectic pace of everyday work. We recommend performing the exercise against a wall at first to relieve strain on the arms. Well-trained individuals can repeat the asana up to five times a day, but never for longer than half a minute each time. Ashtavakrasana is more about precision than speed. Perform the exercise slowly and diligently, and remember that you don't have to prove anything to yourself. Despite the physical benefits, this is still a yoga exercise and not intended to train your arms, core, and legs like you would in a gym. An ideal way to balance out this strenuous exercise is to follow it with a light meditation asana, such as the prayer pose. It's also recommended to learn the eight-angle pose from a yoga expert, as incorrect execution can be harmful to muscles and bones. Image © 4framegroup / 123rf.com

Paripurna Matsyendrasana: the Lord of the Fishes

by Nick on Mar 10 2017
Paripurna Matsyendrasana: the Lord of the Fishes You're familiar with the twist pose from yoga, or perhaps from the relaxation and stretching phase after a sports class. In Ardha Matsyendrasana, you place one bent leg over the other, grasp the knee with your forearm and elbow, and twist your torso over the upper leg. In fact, this well-known pose, which increases spinal flexibility, massages the abdominal organs, and has a positive effect on the nervous system during stress, is essentially just half the twist pose or half the Lord of the Fishes pose. The full, somewhat more difficult version of this pleasant spinal twist is Paripurna Matsyendrasana. A great master as a role model This asana also has a sonorous name derived from Sanskrit. "Matsya" means "fish," "Indra" means something like "king of the gods," and "asana" is the term for "posture" or "stance" in yoga. "Paripurna" translates as "complete" or "perfect," especially when used to describe a person. The Lord of the Fishes (in English, this pose is known as the "Lord of the Fishes") is closely linked to a mythical figure. He is considered a master who, according to legend, founded Hatha Yoga together with Shiva, and gave this graceful asana its name. The difference to the half swivel seat Unlike Ardha Matsyendrasana, the lower leg in the twist pose in Paripurna Matsyendrasana is not stretched out on the floor. It is bent, and the foot rests on your thigh, as in the classic lotus pose . Your forearm, which in the half twist still clasped your upright knee in a bent position, is extended. With your upper arm, you gently press against the knee from the inside. Your hand rests on the outside of your foot. Half variation of the exercise Paripurna Matsyendrasana Most yogis can't do Paripurna Matsyendrasana right away. However, a good place to start is with the half twist pose, where you can already feel the beneficial effects of the twist. Simply practice placing your feet on your thighs separately while assuming lotus position. You can gradually increase the twist of your spine a little more intensified in the half twist pose, but only as far as you feel comfortable. Beneficial effects for body, mind and soul Paripurna Matsyendrasana stretches and twists the spine in a single pose. You'll feel this mobilization as a beneficial effect, as will the lifting and stretching of your ribcage. The expansion of the torso has two additional beneficial effects. Firstly, you stretch and strengthen the muscles of your abdomen and back (depending on which side you perform this twist). Secondly, you massage and revitalize several internal organs, especially your kidneys, liver, and digestive system. In this way, the full twist pose (as well as the half twist pose) can also contribute to detoxifying your body. Of course, with the paired organ and muscle systems, it's important that you perform Paripurna Matsyendrasana in both directions. With regard to mind and soul, Paripurna Matsyendrasana has a balancing and harmonizing effect. The Lord of Pisces pose therefore contributes not only to your external posture but also to your inner balance. The twist pose is a good exercise for balancing stress or restlessness, as you should ensure a calm flow of your breathing. Caution during pregnancy or certain illnesses You should avoid the full twist pose, especially in the advanced stages of pregnancy. At the beginning of your pregnancy, you can still sit up and relax in the half twist pose. Caution is advised if you have any back problems or discomfort, especially problems with the intervertebral discs or spinal nerves. Twisting movements like Paripurna Matsyendrasana can also be counterproductive in these cases. In such cases, it's best to consult your family doctor or perhaps even your treating orthopedic surgeon! Image © byheaven / 123rf.com

Malasana - Garland Pose - Deep Squat

by Nick on Mar 08 2017
Malasana - Garland Pose - Deep Squat Malasana is also known as garland pose or deep squat. This yoga exercise offers various benefits, which you'll learn about in the following guide. You'll also receive useful tips on how to best perform it. The asana is also suitable for prenatal yoga, or pregnancy yoga. How is Malasana performed? First of all, you should warm up beforehand. Place your hands in prayer position (Anjali Mudra) in front of your heart. Inhale and then come into a deep squat. Your feet should be hip-width apart, your hips and groin should be slightly more open, and your pelvis should hang down with your entire body weight. If you can't get your heels to touch the floor, you can place a rolled-up towel underneath them to keep them in the air. Although you should keep your feet flat, keep your body weight on your toes if possible. Bring your elbows in front of your knees and your hands in front of your chest. Now bring your upper body towards your legs, looking straight ahead. Take about five calm breaths before returning to a standing position. What effects can you achieve with Malasana? Malasana is an ideal exercise, especially for pregnant women, to promote pelvic mobility and improve blood circulation to the area. Regular practice can make childbirth easier. Non-pregnant women and, of course, men also benefit from it. The ankles, calves, and lower back can be stretched, and the lower back also relaxes. Furthermore, the asana helps strengthen the abdominal muscles and open and increase mobility in the hips and groin. The deep squat also boosts the metabolism, stimulating digestion and preventing constipation. The intestines can be brought back into their ideal rhythm, thus optimizing metabolism. You can also strengthen your balance through the Garland Pose. The energetic effect of the asana is also very noticeable. Since Malasana induces a feeling of calm, it is important that you truly immerse yourself in the deep squat. What should you pay attention to when doing Malasana? Correct execution of the exercise is very important to reap its positive health benefits, but there are a few tips. If you feel tired in the pose, for example, you can shift your body weight onto your heels and then back onto your toes. The deep squat has various positive effects, but the asana is not suitable for everyone. People suffering from serious knee injuries should avoid this pose. If you have minor knee problems, you can also sit on several blocks to relieve pressure on your knees. You can place your feet slightly wider or closer together to find the distance that suits you best. If you have lower back problems, you should consult a doctor or yoga teacher , or try the asana with the latter. Conclusion This is the useful information and tips about Malasana. This yoga exercise is ideal not only for pregnant women due to the numerous benefits that can be achieved with correct and regular practice. To maximize the effect of the deep squat, it is recommended to lie on your back at the end, place your feet on the floor, and let your knees collapse. Close your eyes, place your hands on your stomach, and breathe. You will notice how good this feels. For beginners, practice is worth it. It is important to take the time to get to know your own body and get used to positions like the deep squat. Image © fizkes / 123rf.com

Pashasana: The Noose of Samsara

by Nick on Feb 28 2017
Pashasana: The Noose of Samsara Pashasana (sometimes also "Pasasana") is a continuation of the word "pasha," which means "rope," "fetter," "noose," or "trap." "Asana," on the other hand, means "posture," "seat," or "position." The term is therefore used for anything that is intended to bind the soul and thus binds oneself to the cycle of rebirth (samsara). Pashasana is a pose in which the body is formed into a loop. To achieve this "loop of rebirth," the arms are wrapped around the legs and back. Performing the Loop of Samsara This exercise is especially recommended for advanced practitioners. When performing the pose, ensure that you reach the looped position slowly. Breathing should also be considered with each step, and this becomes important not only in the final Pashasana pose. Inhale after each movement listed here, then exhale with the subsequent movement. At the beginning of the exercise, raise your arms to the sides, spread your fingers, and point them toward the floor. Inhale and then exhale. Squat down and try to find your balance. In the squatting position, lower your feet. Your bottom is now off the floor, and your knees are pointing towards the ceiling. Now reach around your knees with your right arm and cross them so that your right arm is touching your outer right thigh. You can tell if the twisting movement is correct when the outside of your hand touches the outside of your thigh. This means that your arm, including your shoulder, is turned very far. During this phase, you can use your left arm to support yourself so that you don't lose your balance while squatting. After inhaling and exhaling several times, you can then move into the final Pashasana pose. To do this, raise your left arm, which has been supporting you so far, and bring it behind your back towards your right arm, which is still in contact with your thigh. The goal is for both hands to touch, so that you are essentially "shaking hands." For this to work, your left arm must also be twisted widely. Your entire upper body automatically moves to your left. Your chest will then rest next to your left leg. In this position, you can then grasp each other's wrists. You are now in the final Pashasana pose, and you should inhale and exhale at least five times, find yourself, and feel the active stretch in your torso, arms, and legs. Make sure you don't lose your balance as your hands connect. To increase the tension, you can also turn your head and look toward the ceiling. This will create additional tension in your neck. Practice the loop or Pashasana step by step Because this is an advanced exercise, you should practice it step by step. The goal isn't to force yourself to the point of painfully spraining yourself or pulling a nerve. If the full loop doesn't work right away, you can also work your way up to the final pose by gradually working through several partial exercises. Pashasana is said to have a therapeutic effect on back pain. So, if you suffer from tension or localized pain in the back and neck area, it may be able to alleviate it. Painful tension in the shoulders may also be relieved. Furthermore, Pashasana may have positive effects on digestive problems, asthma, or menstrual cramps. This exercise could also provide short- to medium-term relief from bloating. Image © fizkes / 123rf.com

Setu-Bandhasana, the Yoga Bridge

by Nick on Feb 24 2017
Setu-Bandhasana, the Yoga Bridge Setu-Bandhasana, the bridge pose, is a counterpart to Shoulderstand and Plough Pose . It is an effective foundational pose in the popular Yoga Vidya series. The bridge pose is followed by the Wheel Pose (Chakrasana) or the Fish Pose (Matsyasana) . In the following guide, you'll learn how to perform this yoga exercise correctly, what to keep in mind, its benefits, and who it's suitable for, or who should avoid. How does the Setu-Bandhasana Bridge work? To perform this yoga pose, lie on your back and raise your legs. Place your feet hip-distance apart. Your knees and ankles should be in a straight line. Place your arms lengthwise, palms facing down. Inhale and slowly lift your back. You can support your back with your palms. Gently roll your shoulders. Touch your chin with your chest, but do not move it. Tighten your buttocks, and rest your body weight on your shoulders, arms, and feet. Breathe calmly throughout the pose and hold for about two minutes. Exhale to end Setu Bandhasana Bridge. What are the effects of the Setu-Bandhasana Bridge? Physical Benefits of Setu-Bandhasana Setu Bandhasana Bridge can release tension in the lumbar spine and neck, as well as strengthen the wrists, legs, and buttocks. The exercise has an invigorating effect, especially for a tired back. The thighs are strengthened. The muscles are strengthened and stretched. The same applies to the chest, neck, and spine. The latter remains or becomes flexible and revitalized. The entire front of the body is intensely stretched, and the back of the body is strengthened. The exercise also contributes to the normalization of thyroid function, which can prevent or alleviate symptoms. Furthermore, it promotes the expansion of the abdominal organs, thus positively affecting digestion. This yoga pose opens the lungs, which can also improve breathing. It is also beneficial for asthma, high blood pressure, and osteoporosis. In the bridge pose, the abdomen is higher than the heart, which improves the return of blood to the heart. The abdominal organs can also regenerate. This yoga pose is also helpful during menstruation and for menopausal symptoms. Mental, energetic and spiritual benefits of Setu-Bandhasana This yoga pose calms the brain, can reduce anxiety, and contributes to stress reduction and alleviates depression. The bridge is considered a rejuvenating exercise. Spiritually, the practice helps achieve wholeness. Who is the Setu-Bandhasana Bridge not suitable for? When performing Setu Bandhasana Bridge, contraindications should be strictly observed. Anyone suffering from neck, thyroid, or lower back problems should only perform this yoga pose after consulting a doctor, alternative practitioner, or yoga instructor. People with severe lower back pain should not perform the bridge pose from shoulder stand, but rather from a supine position. Inversion poses should also be avoided in cases of eye disorders, retinal detachment, high blood pressure, or serious heart conditions. Conclusion These were the best tips for the Setu Bandhasana Bridge. Whether you're suffering from tension, back pain, or lack of mobility, this yoga exercise will help you feel stronger and more flexible. This isn't just beneficial for professionals who sit for several hours a day, or who carry heavy loads or generally perform physically demanding tasks. The exercise helps maintain correct posture and thus avoid various ailments. Image © fizkes / 123rf.com